
My main focus throughout my capstone project experience has been ideating, prototyping, and developing this marble toy. The marble toy is designed to make electronics and coding concepts accessible and playable for young creators, by combining a modular marble run toy with electronic components and curriculum.
Prototyping has been temporarily stagnated by the COVID-19 pandemic, though a basic proof of concept has been achieved, and a more robust proof of concept is in development.
This project would not be possible without the brilliance, guidance, and expertise of Trent Jones, maker in residence.
The Toy
The toy emulates the design of a breadboard, with the blocks housing different electronic components. When the player arranges the blocks in different configurations, it is technically no different than wiring up a breadboard with resistors, jumper wires, and electronic components. However, the marble toy is designed to remove all the guesswork and intricacies of electronic prototyping, lowering the barrier of entry to start playing with electronics. A child who plays with this toy when they’re young will have a built in familiarity with electronics and find it easier to transition over to traditional electronics and code when they’re older.
Here are some first stage renders of the concept, exploring different styles of play that could be achieved on the 5x5 grid with modular components.
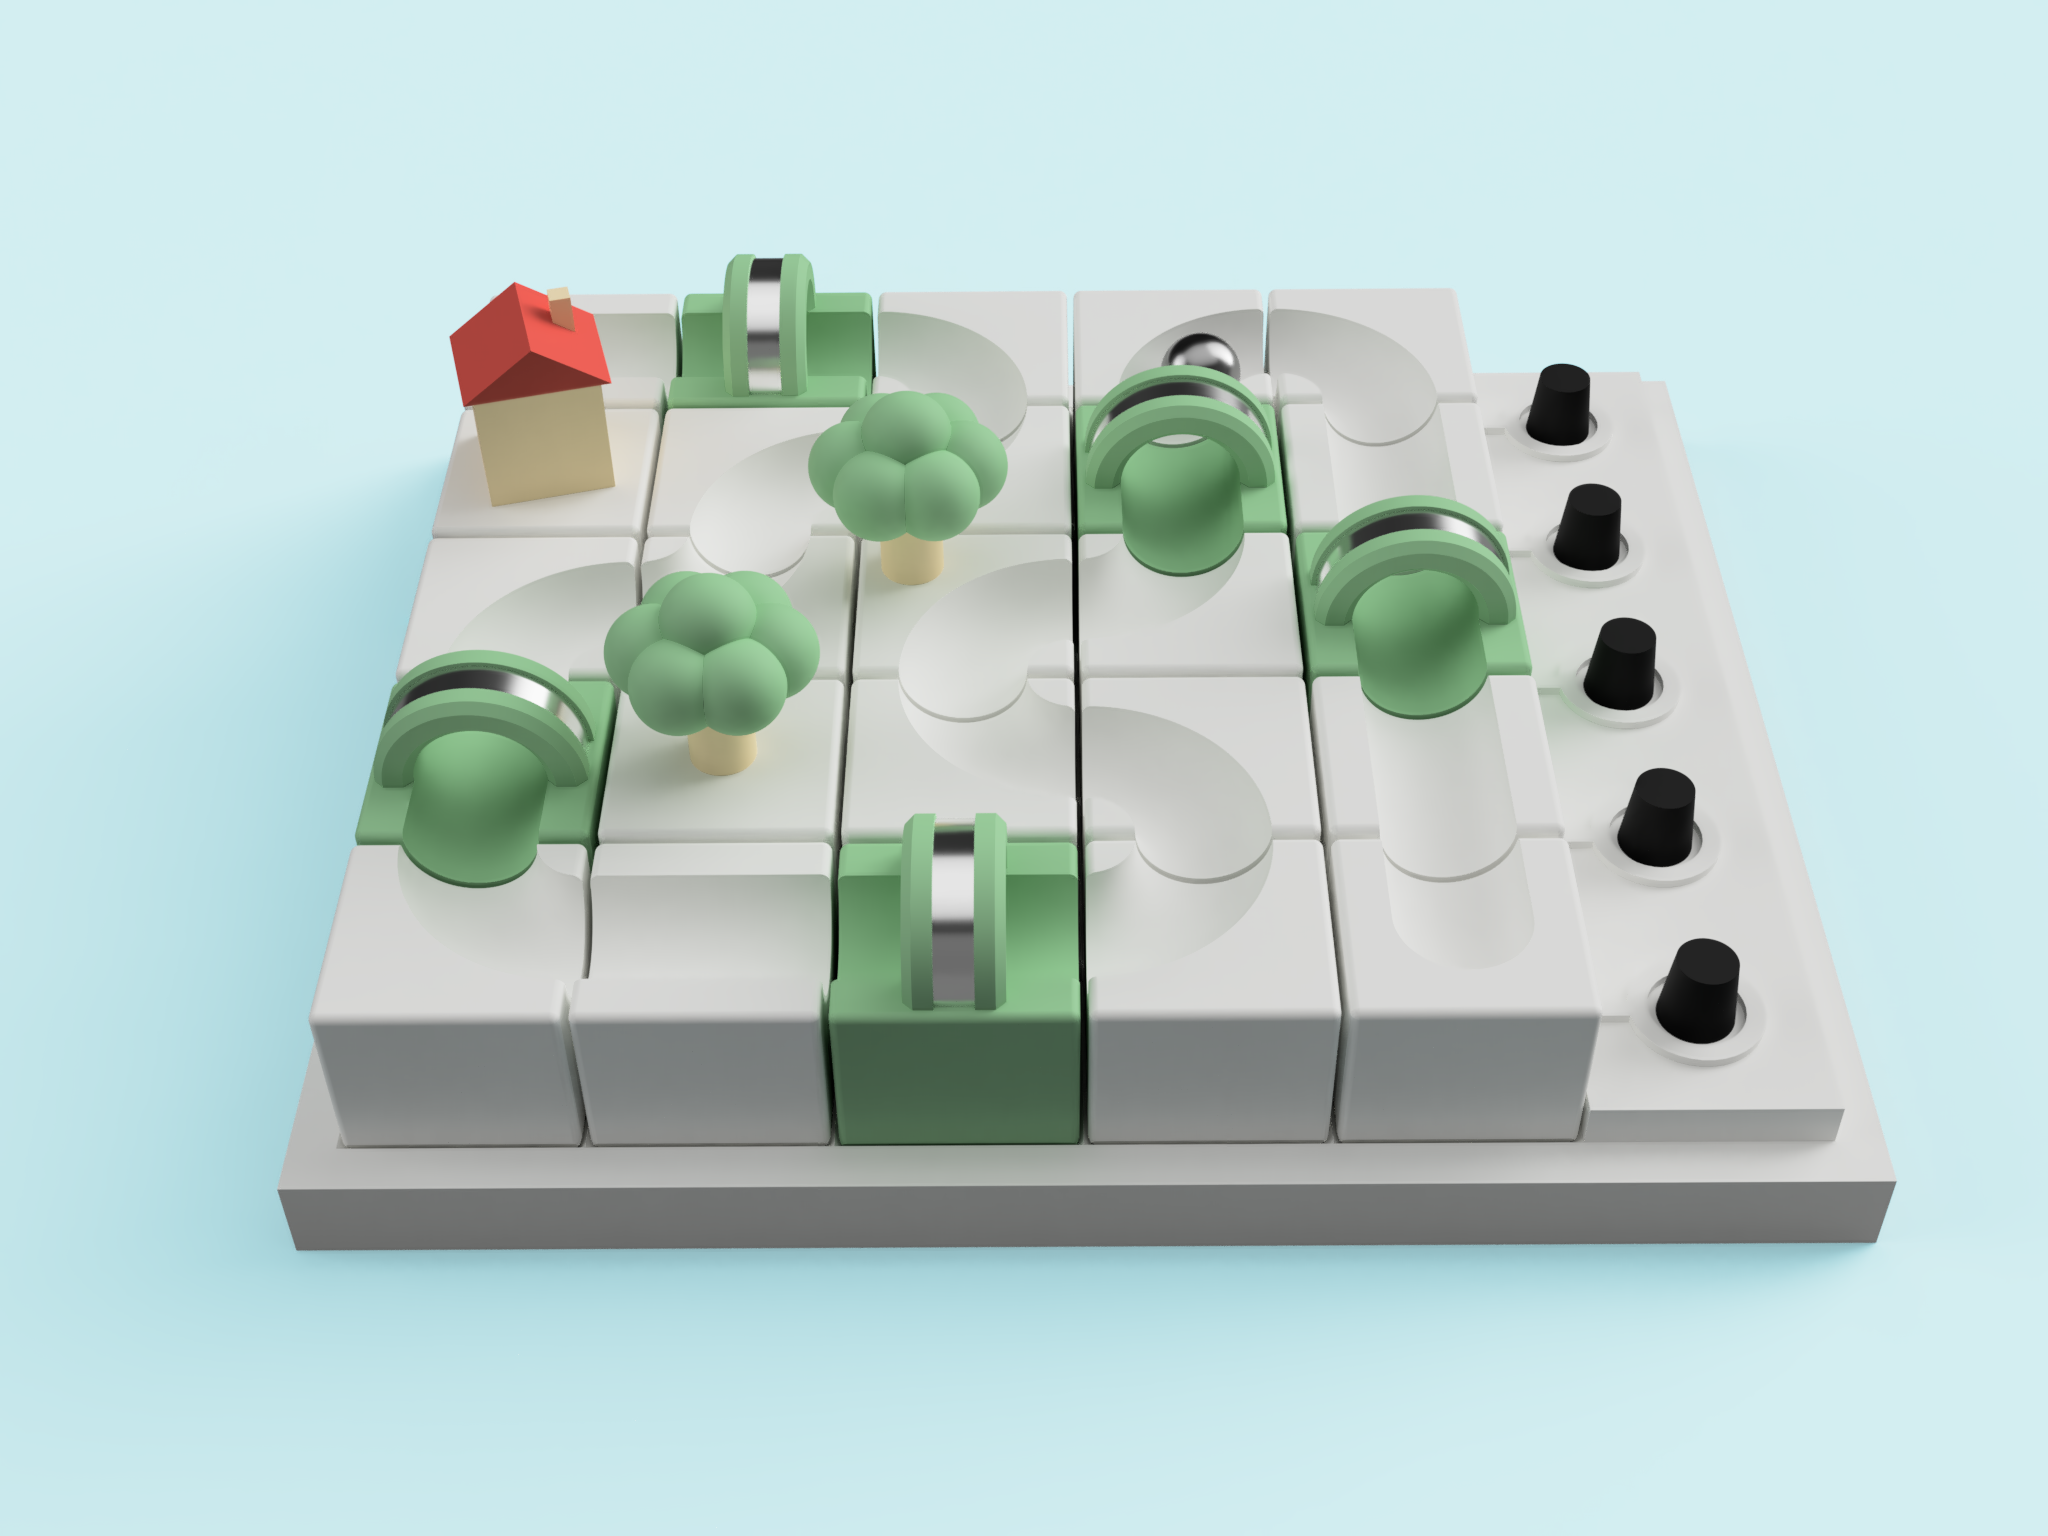
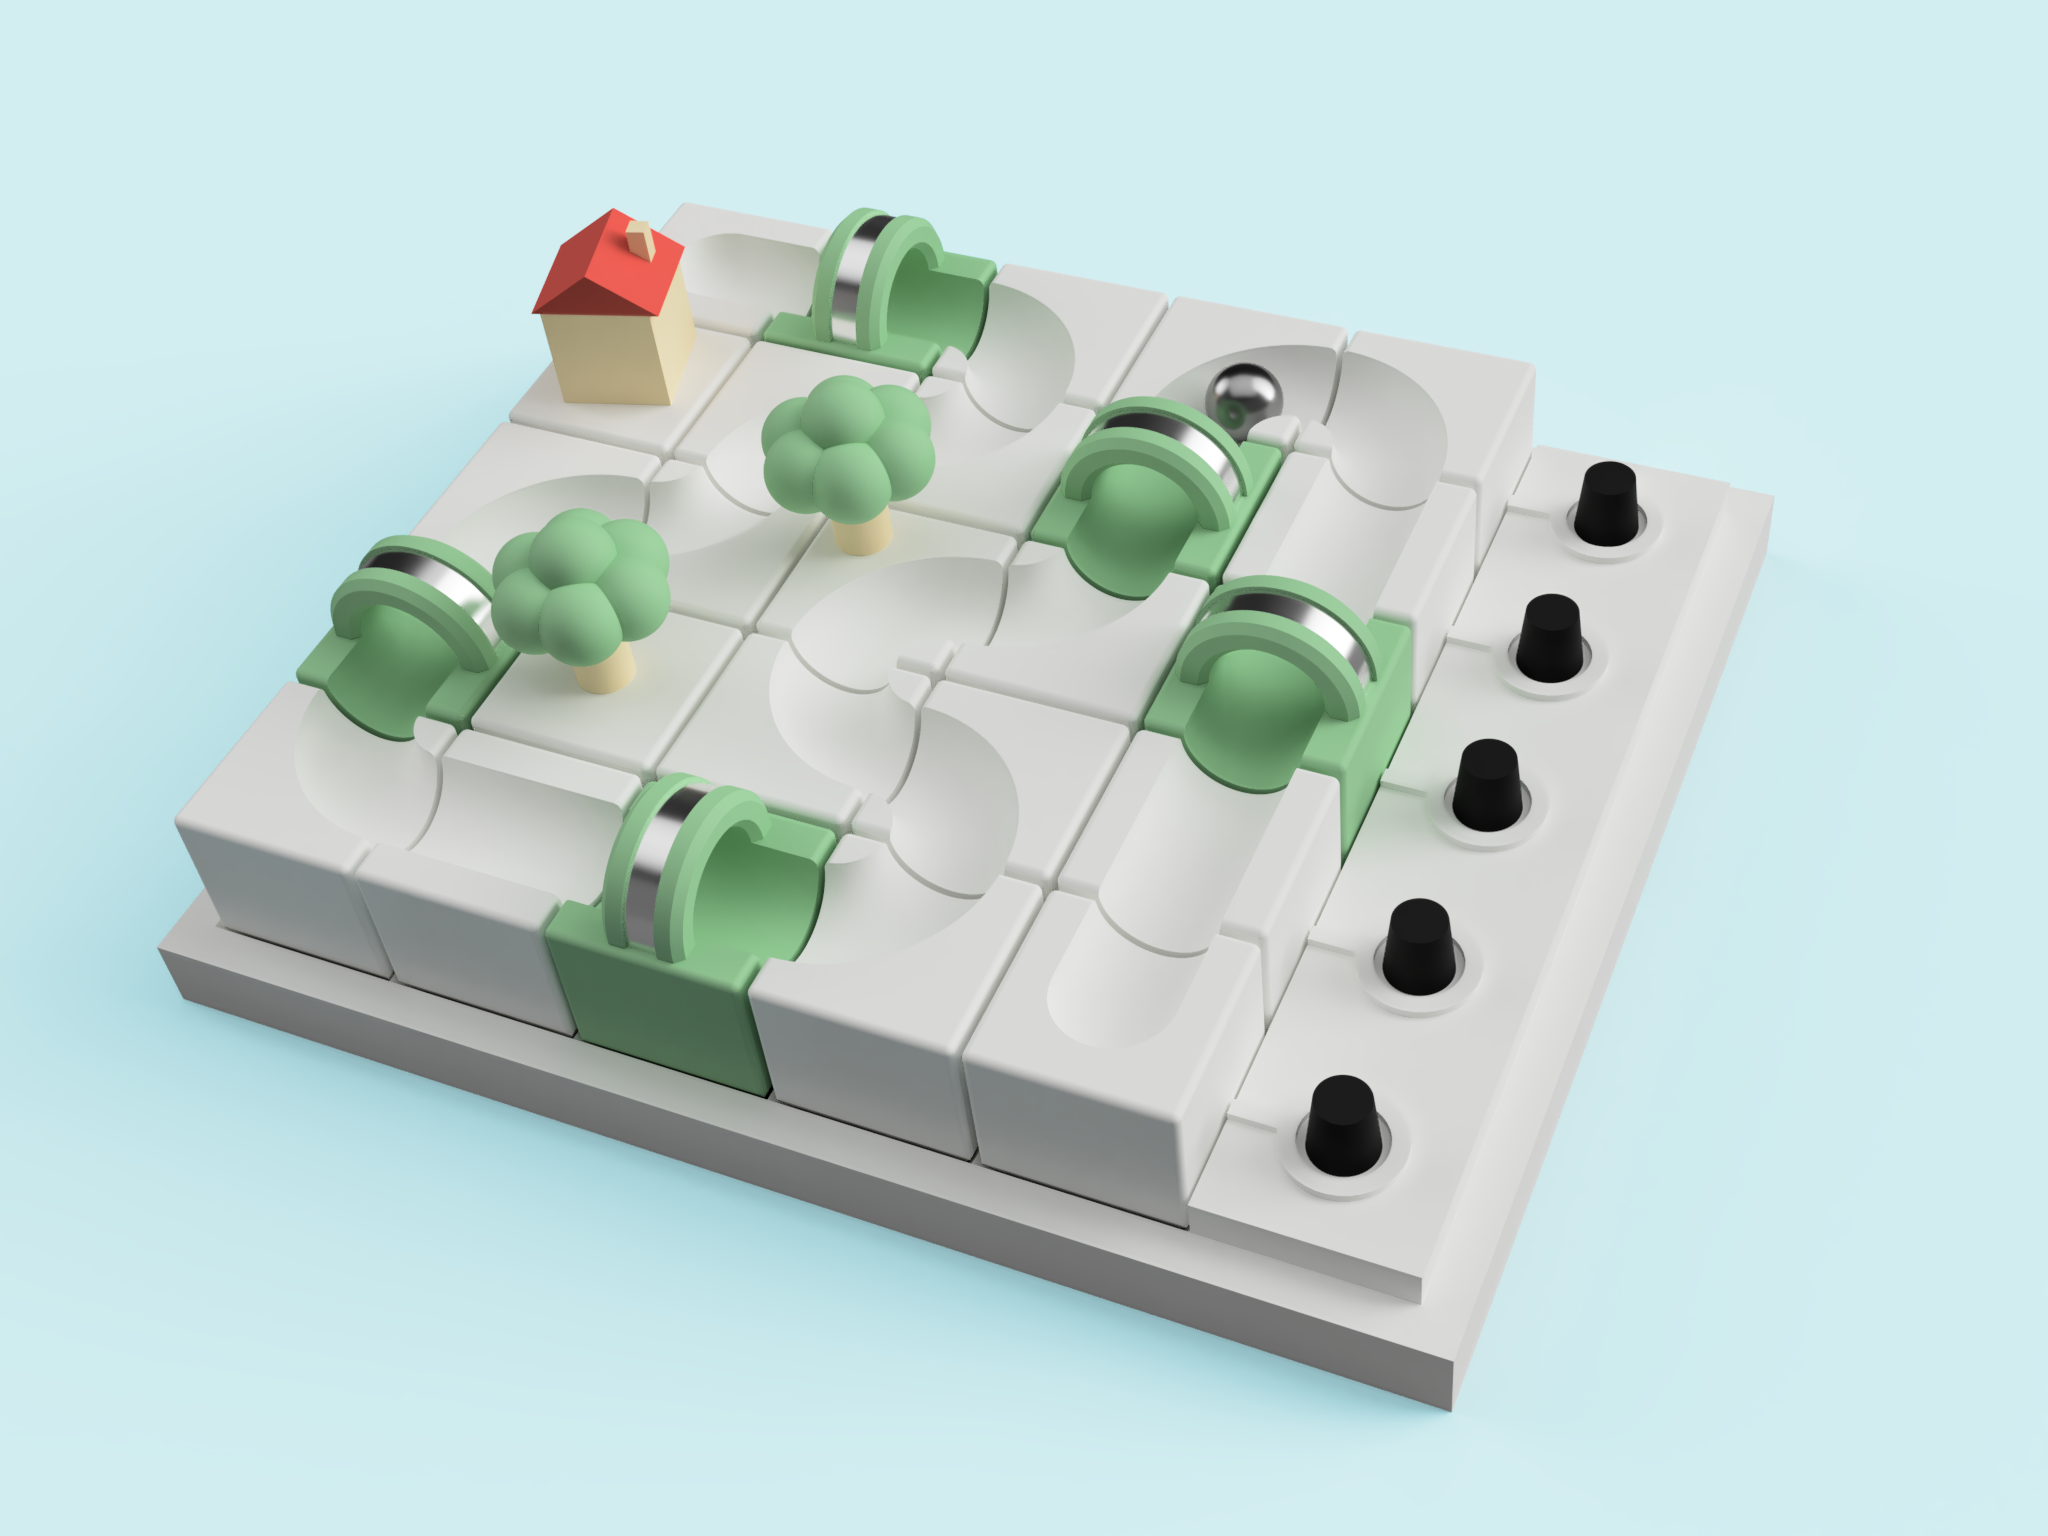

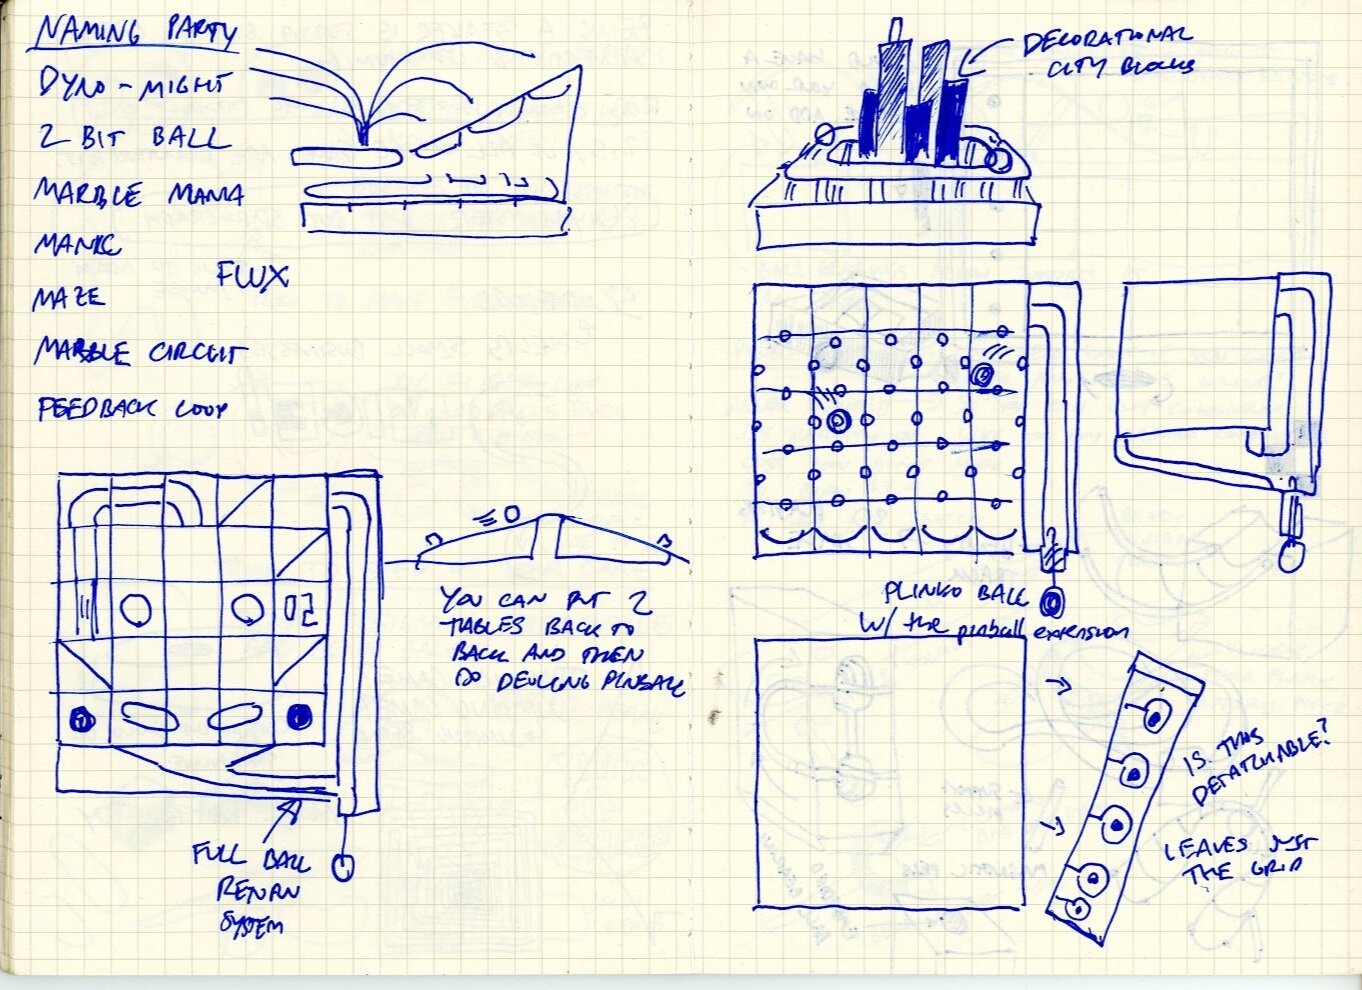
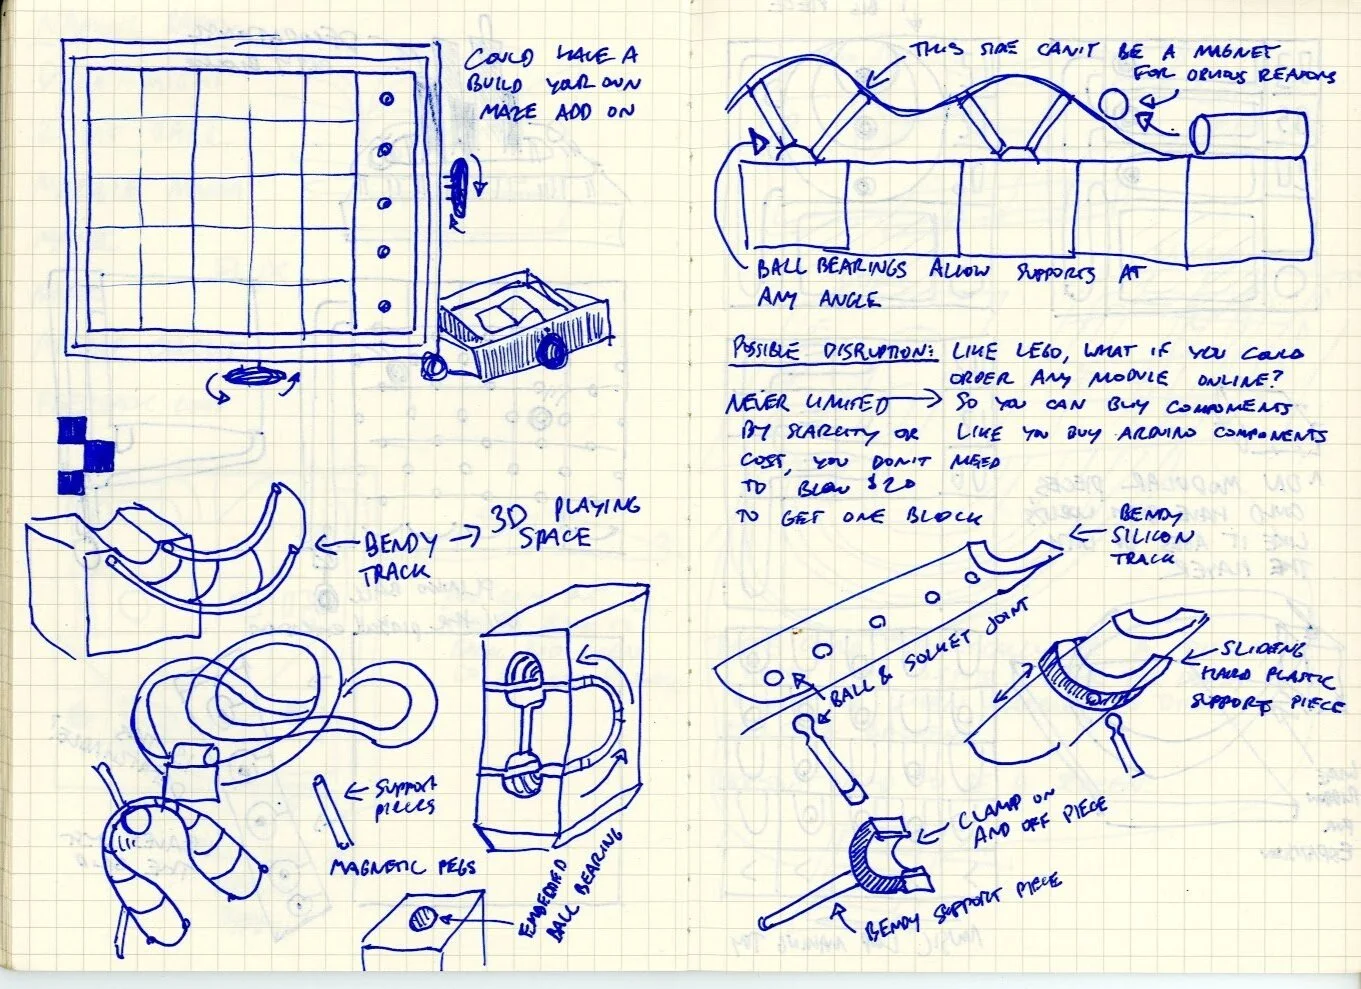
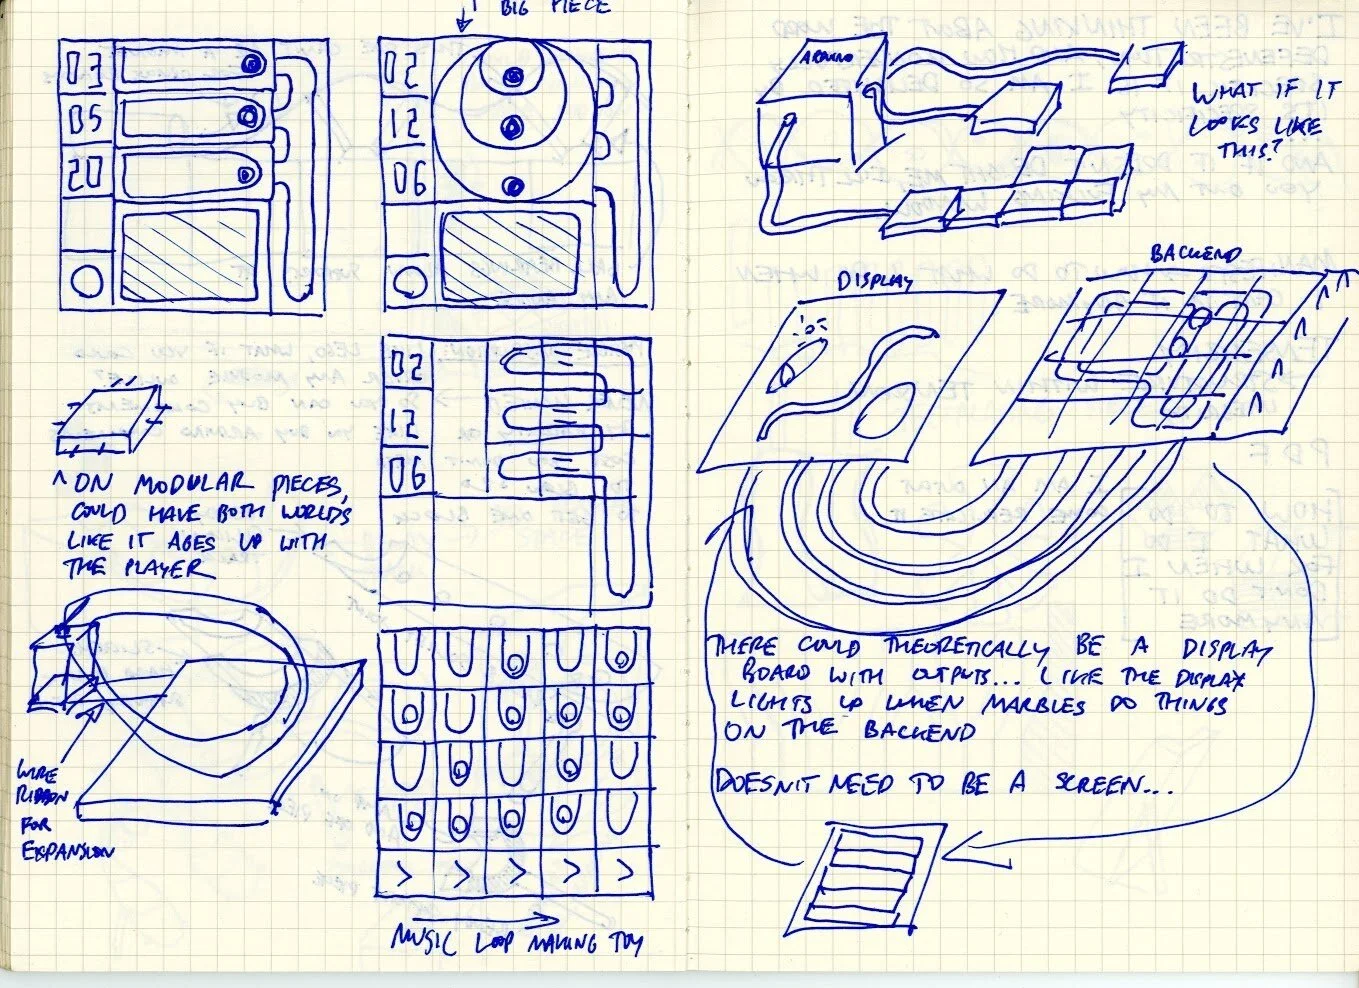
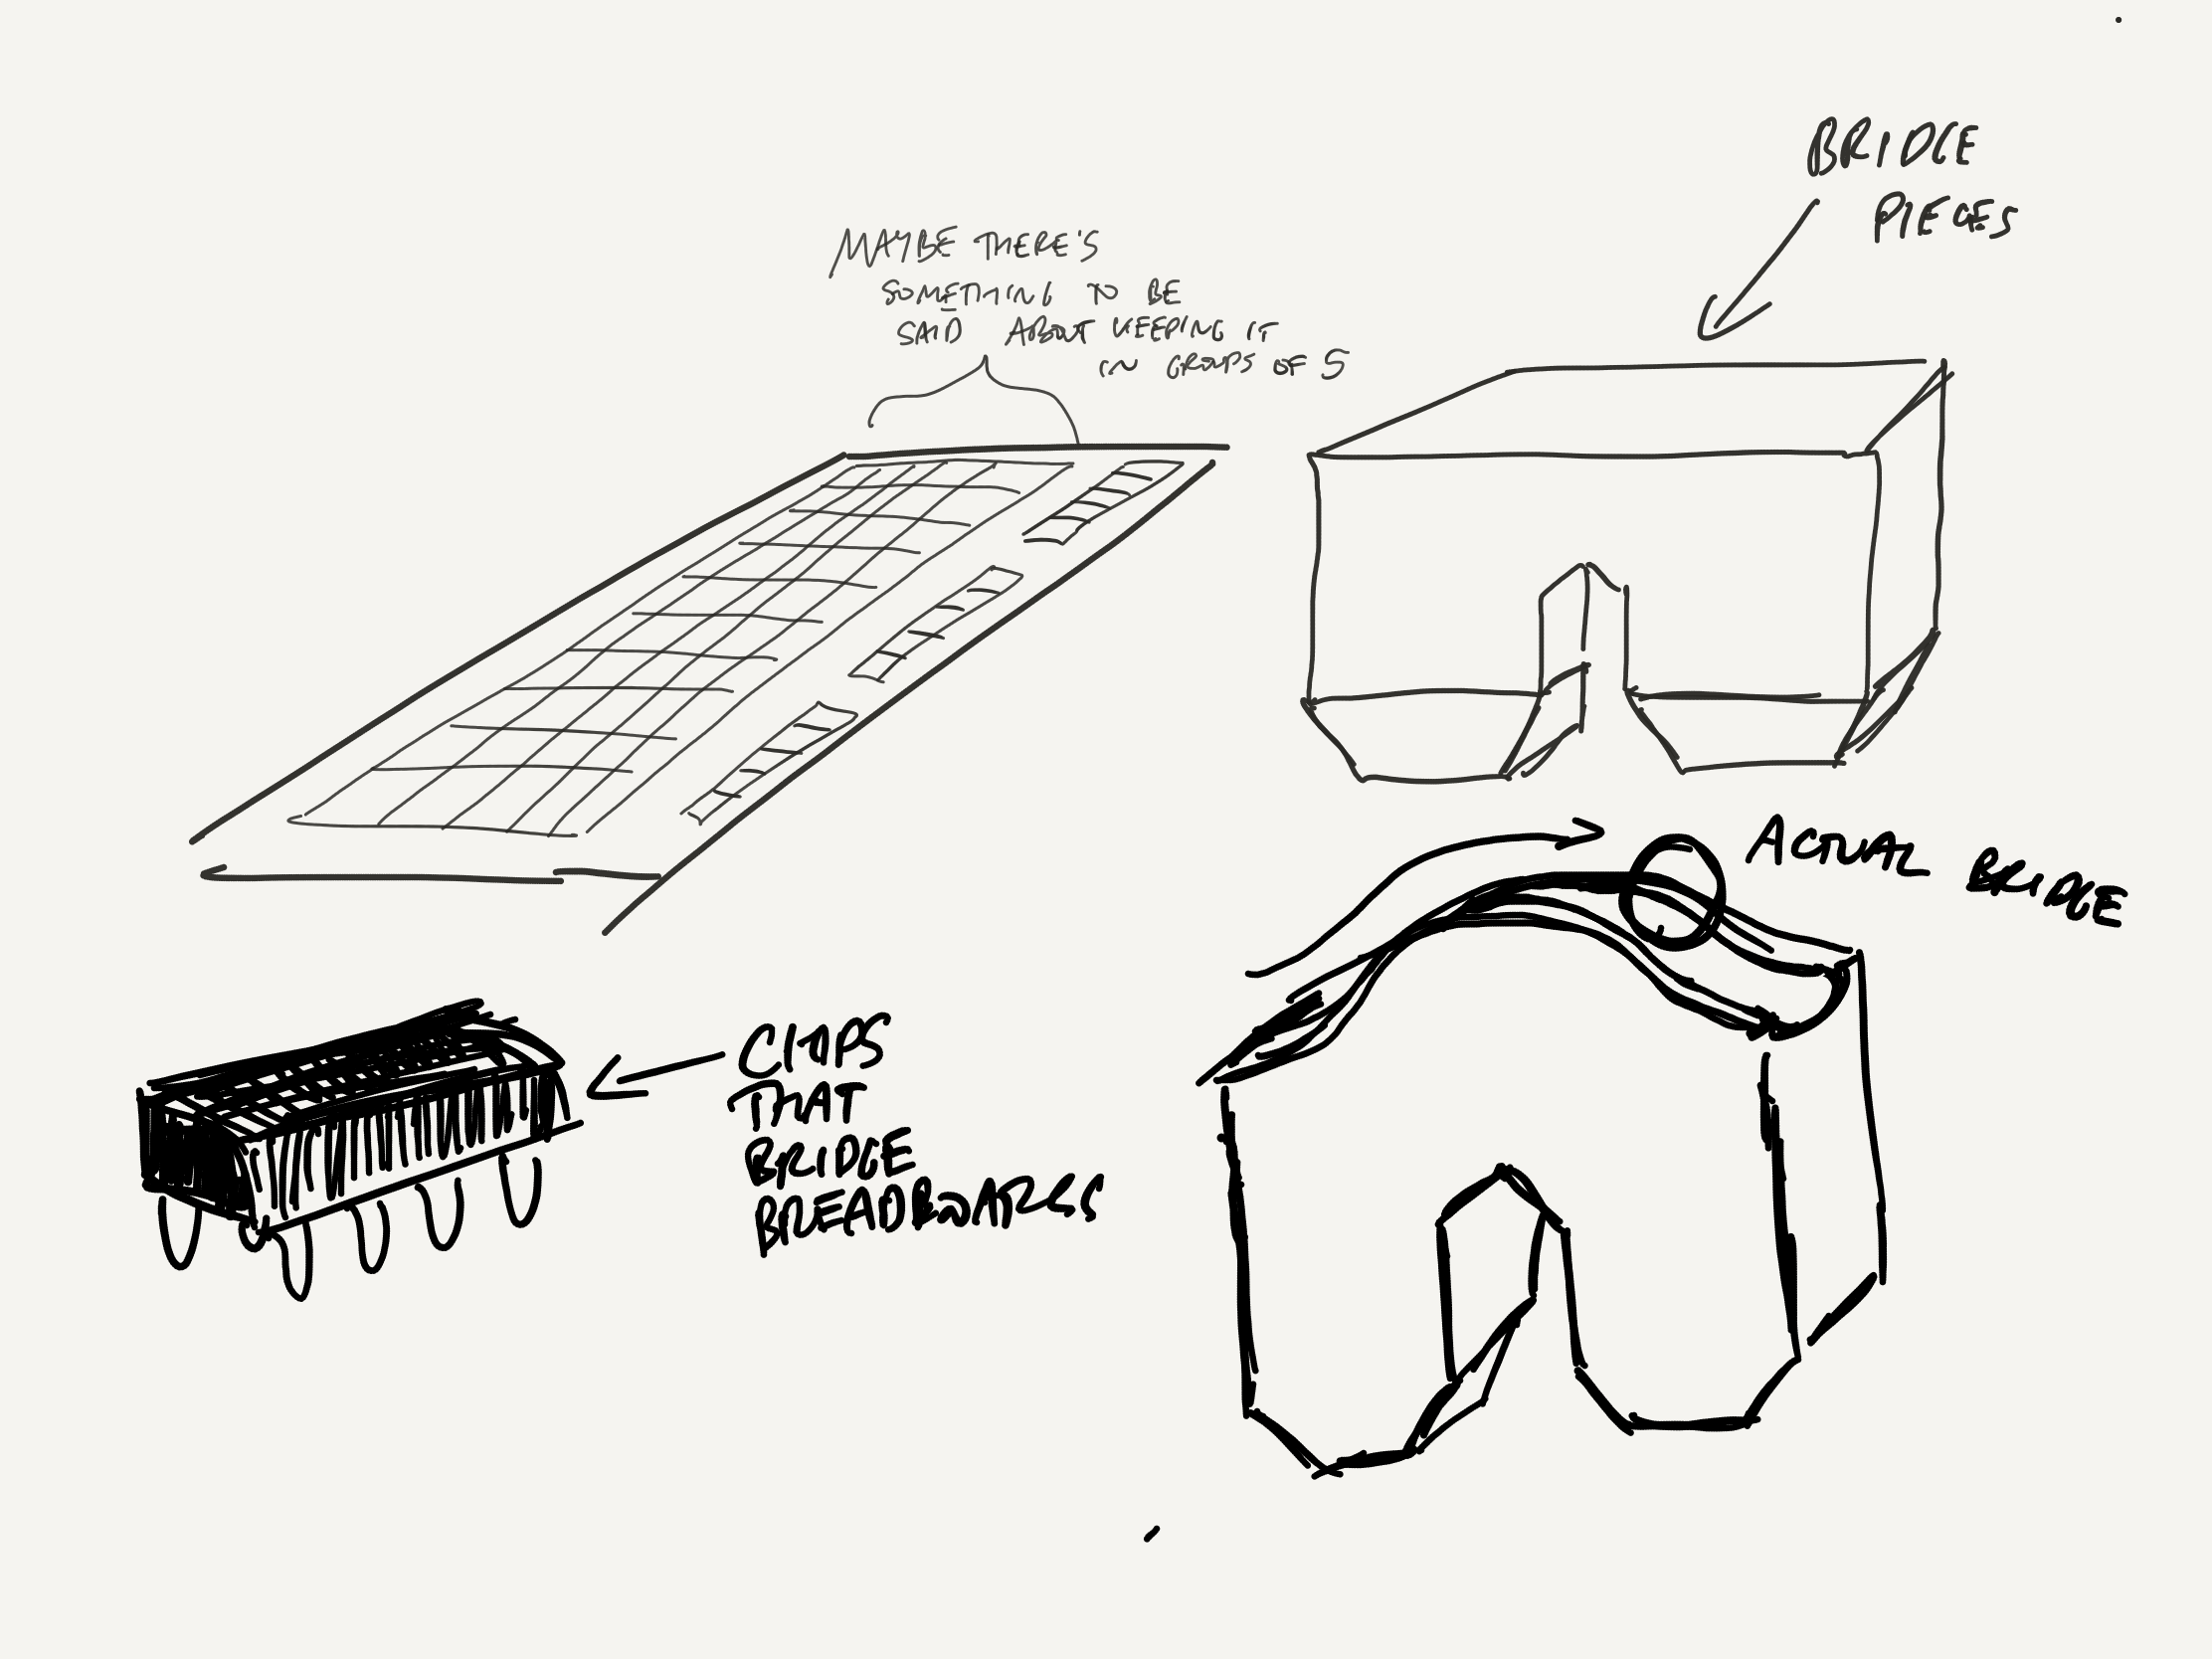
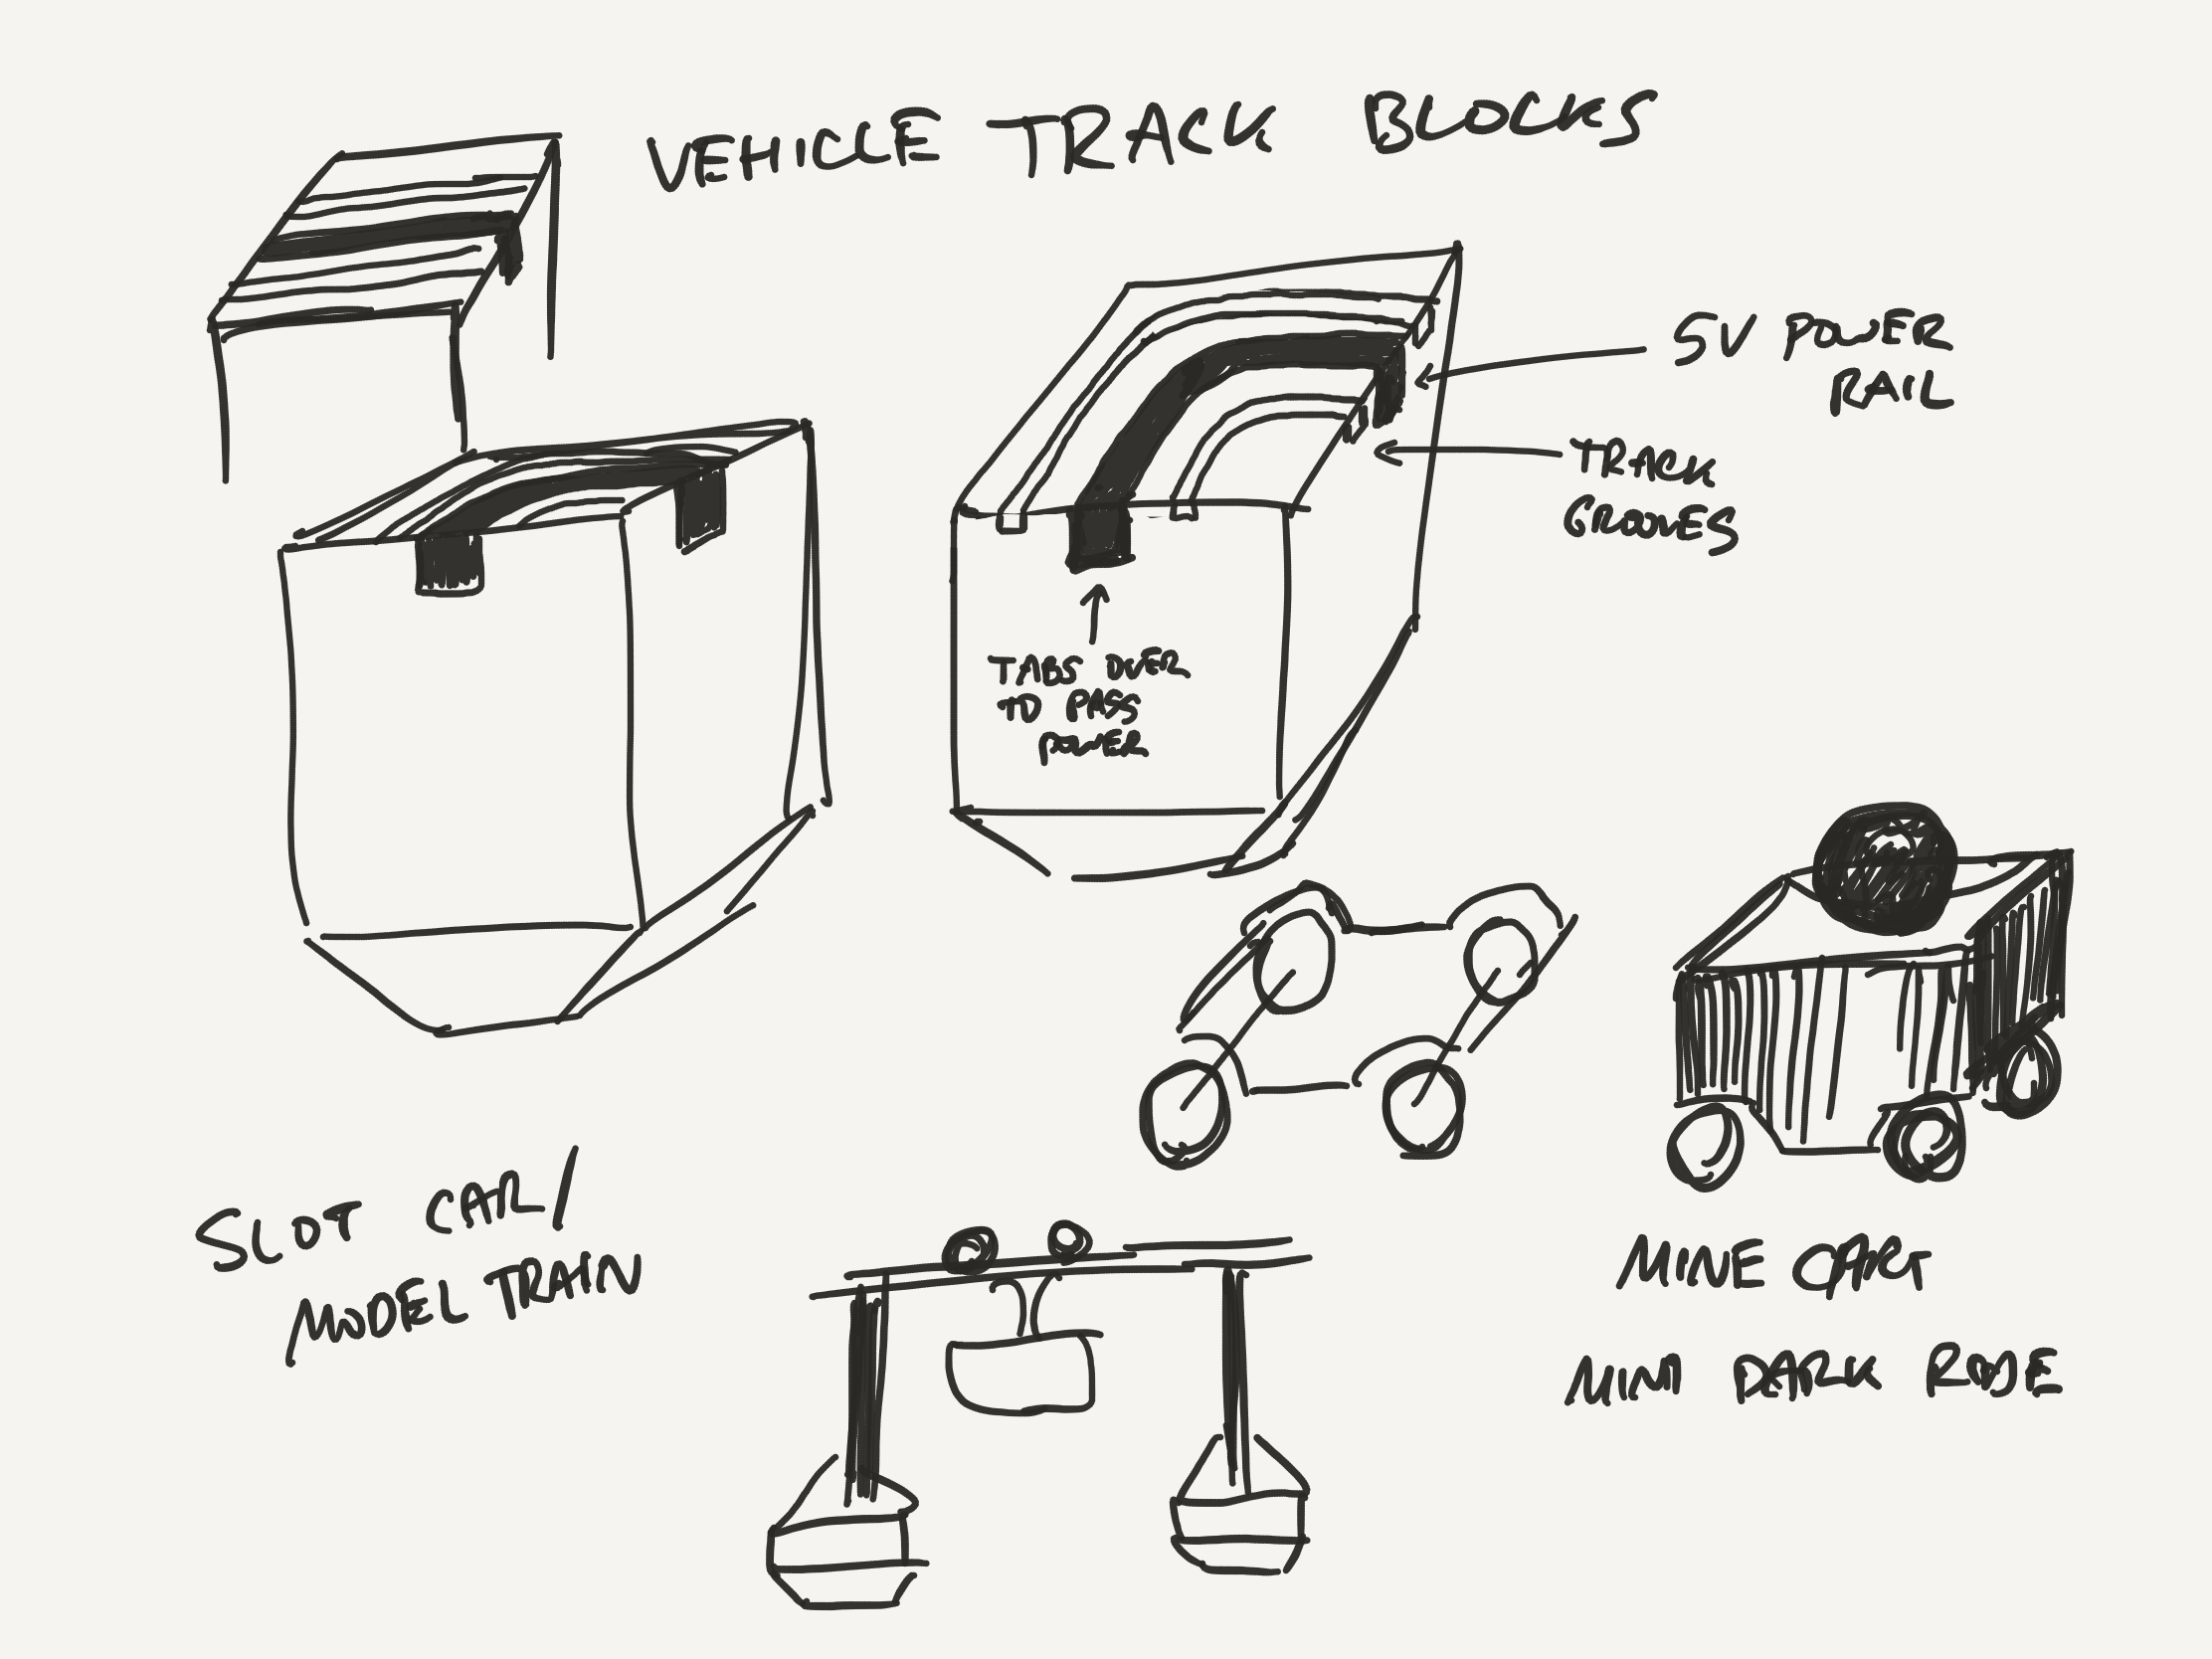
Ideation
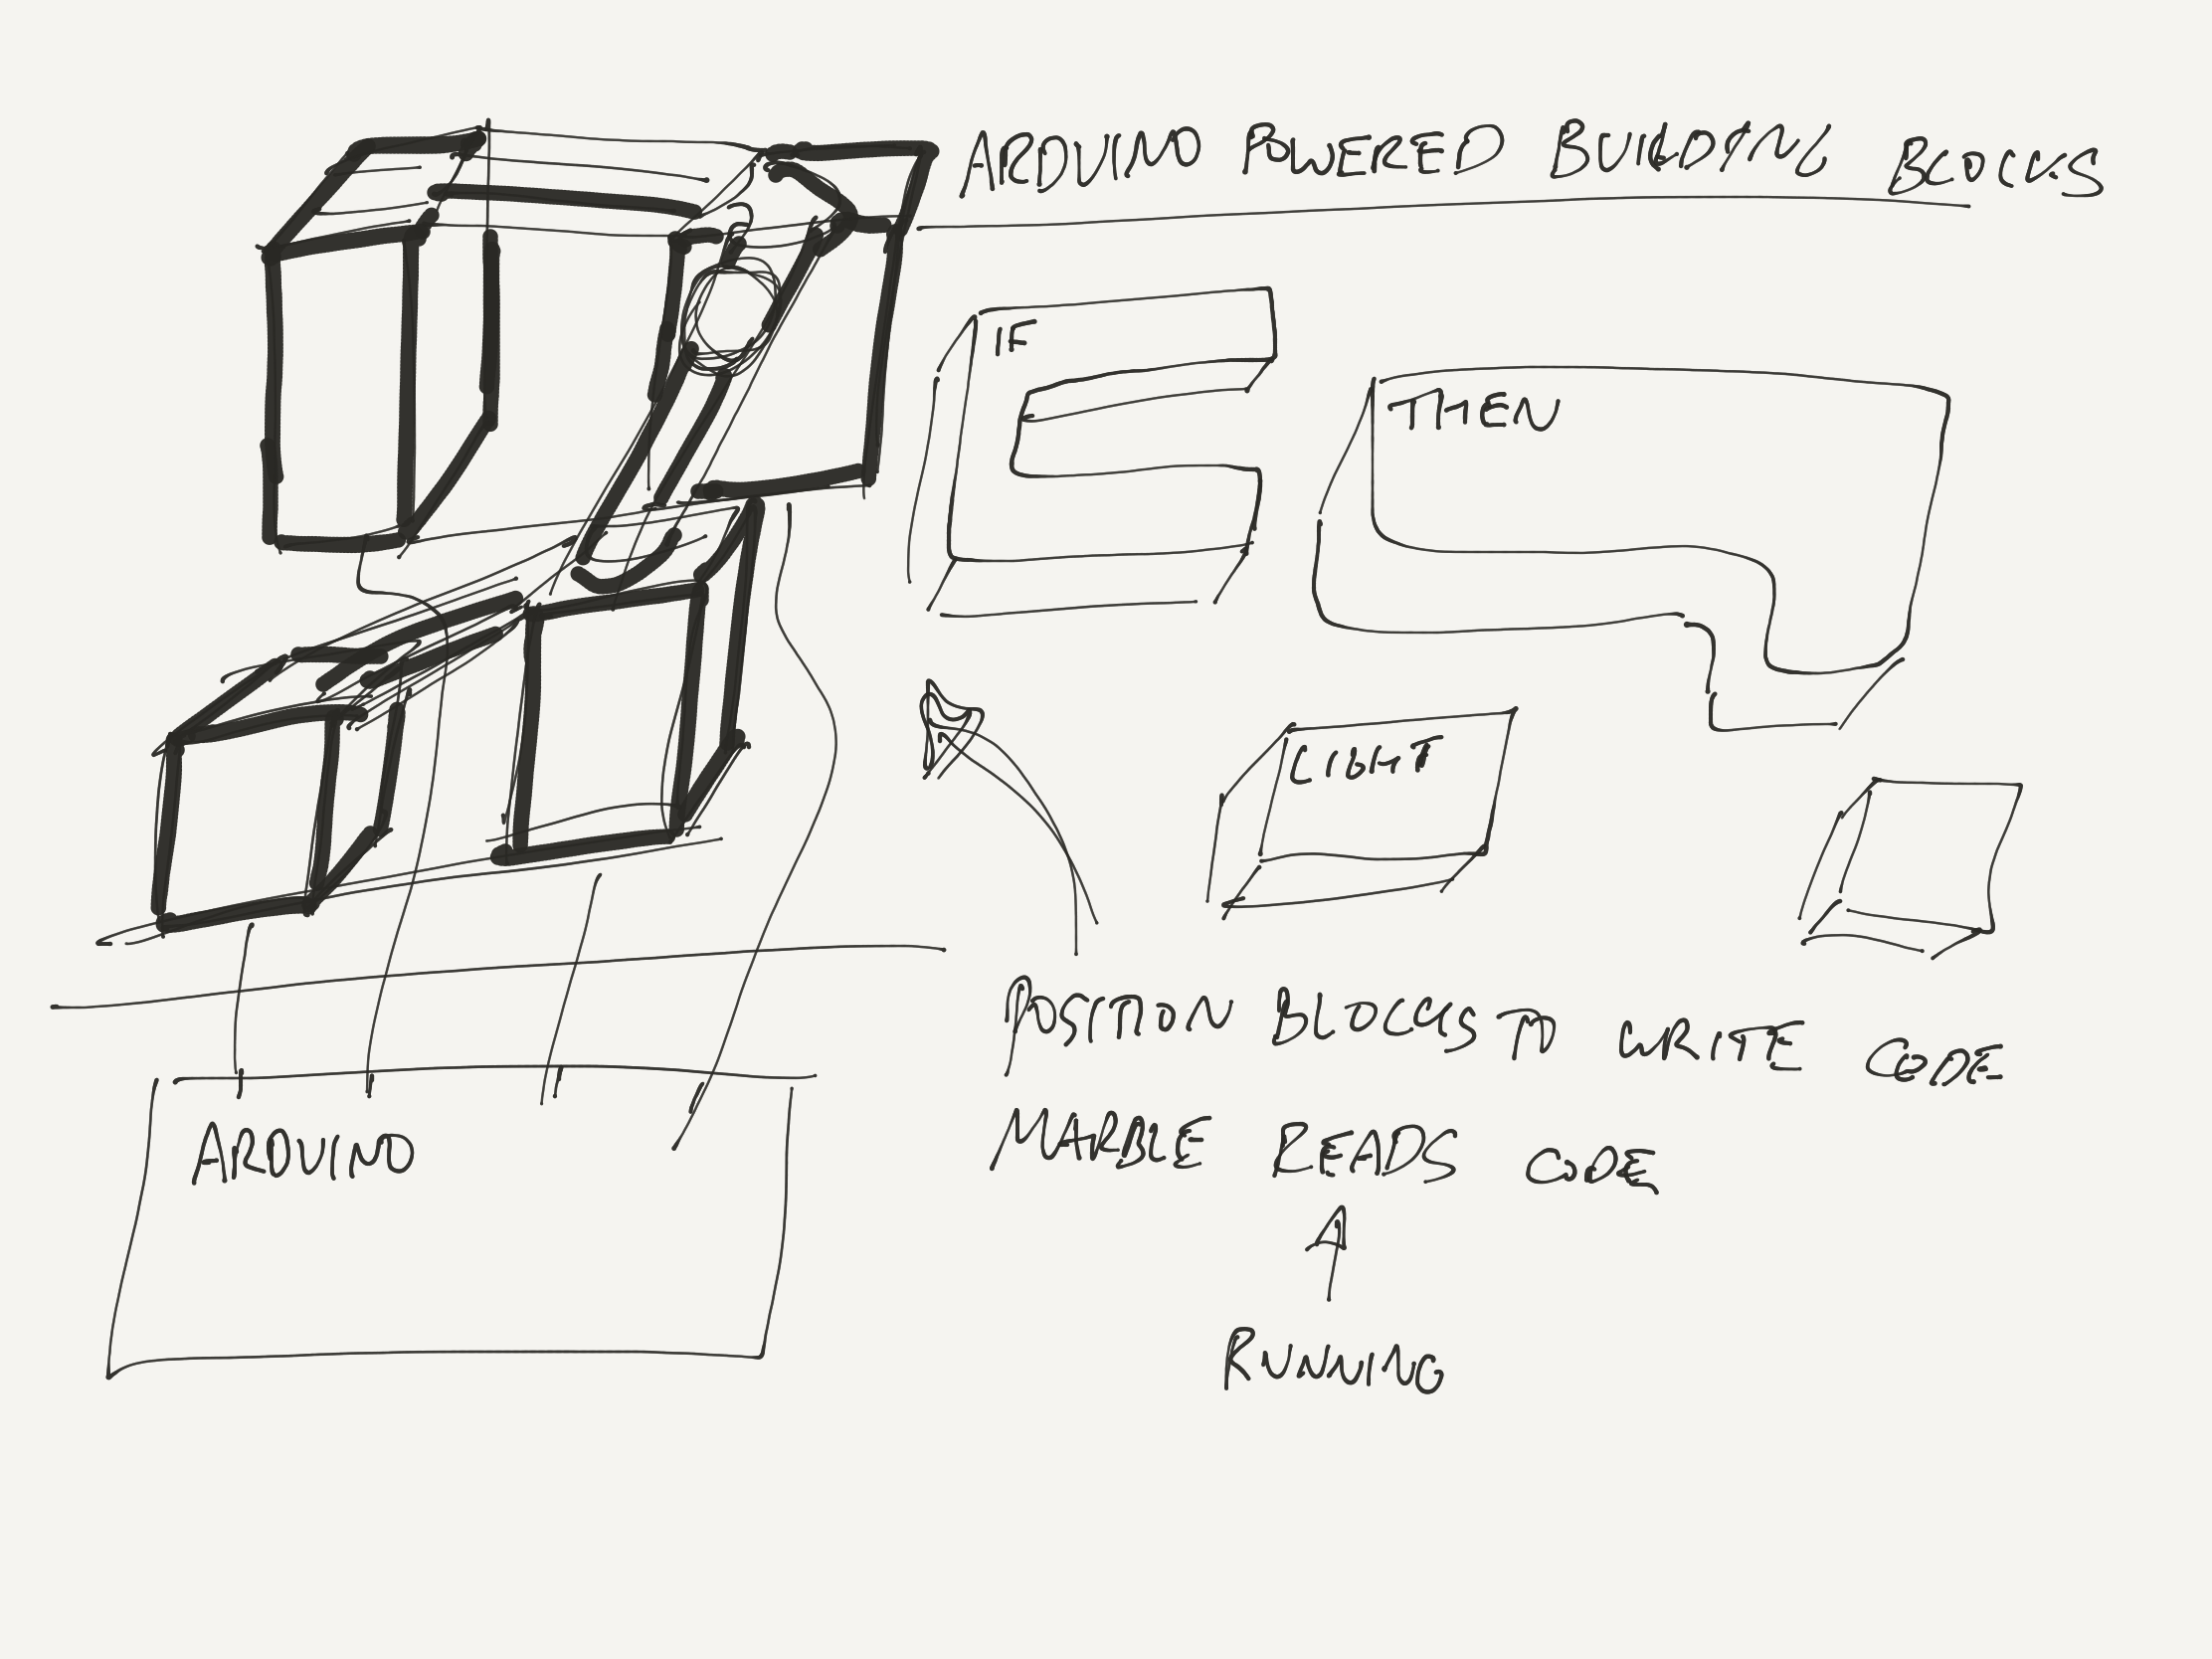
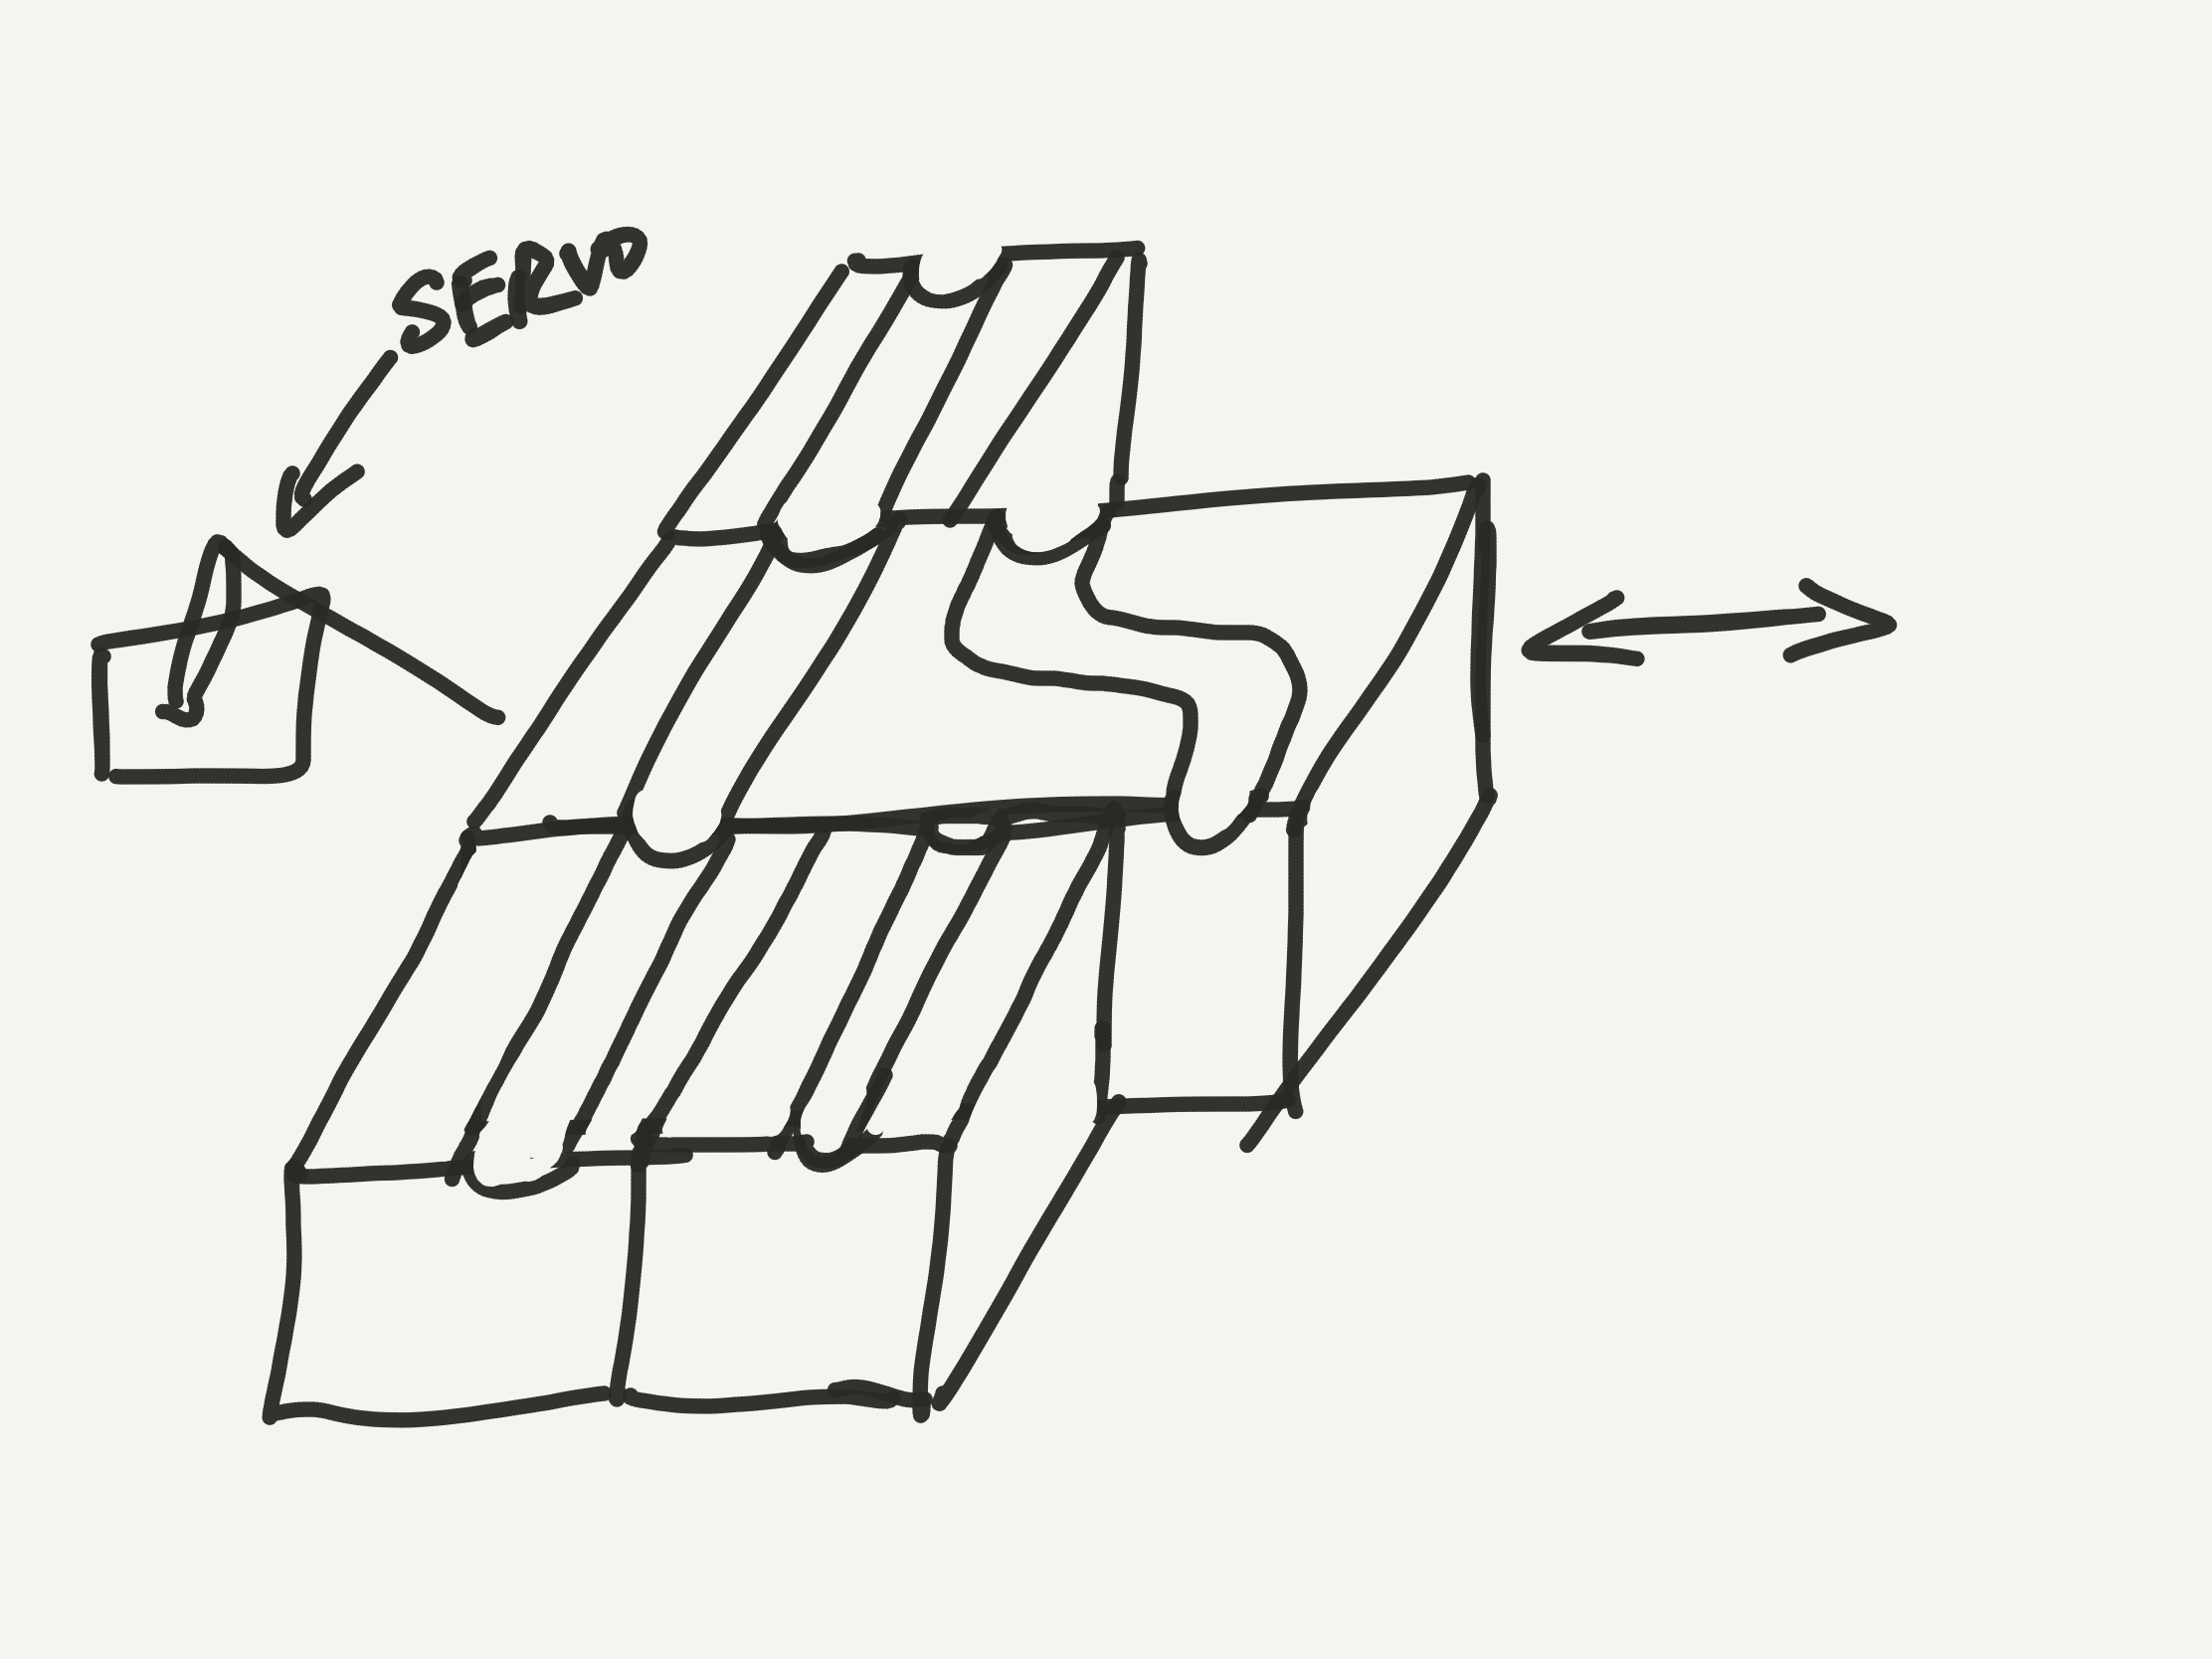
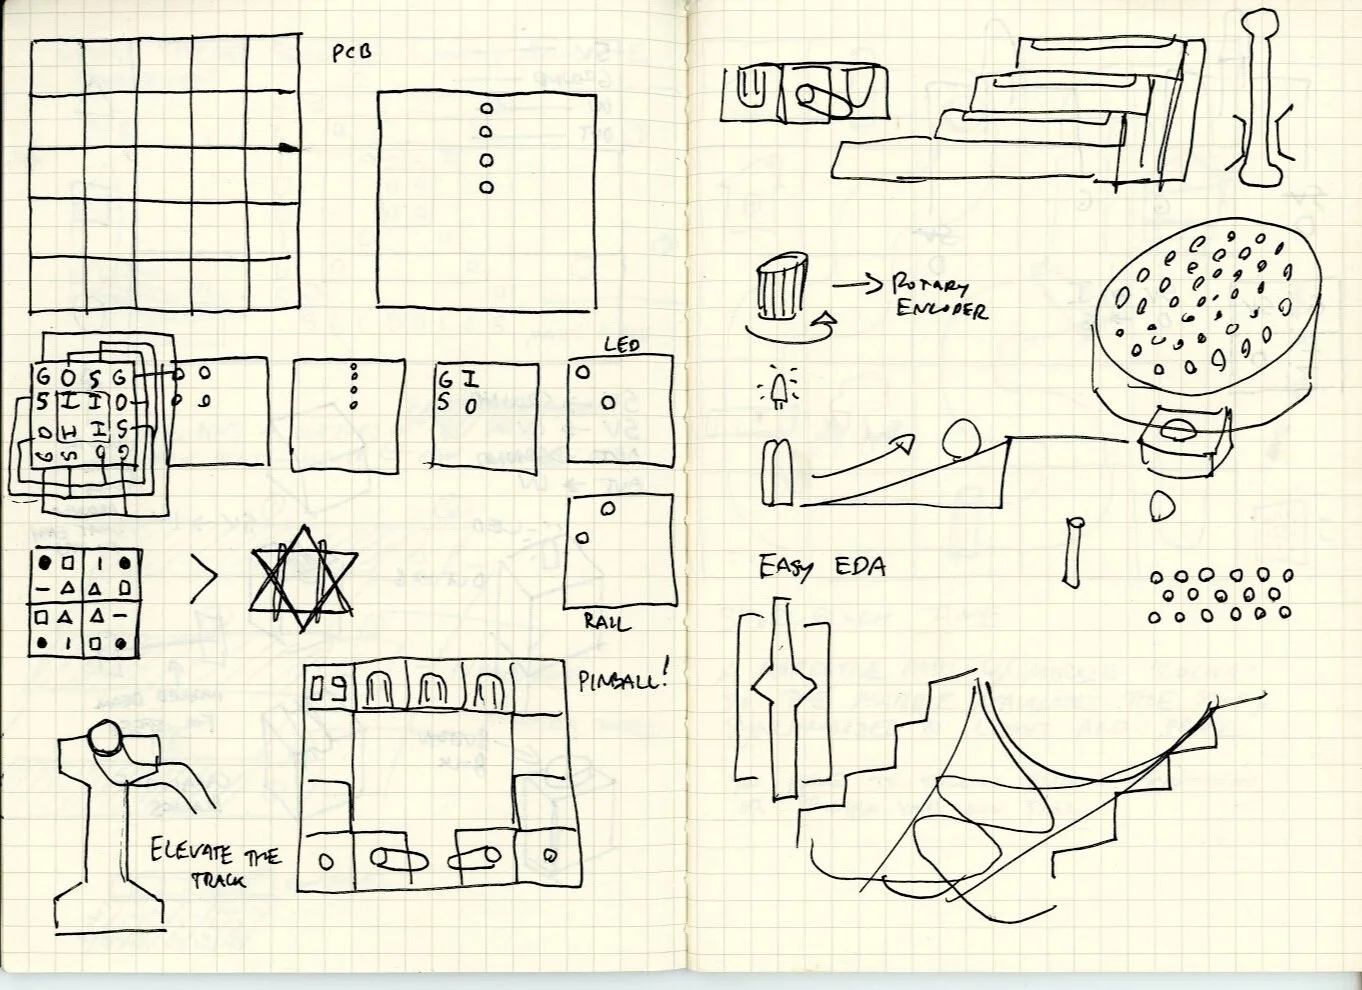
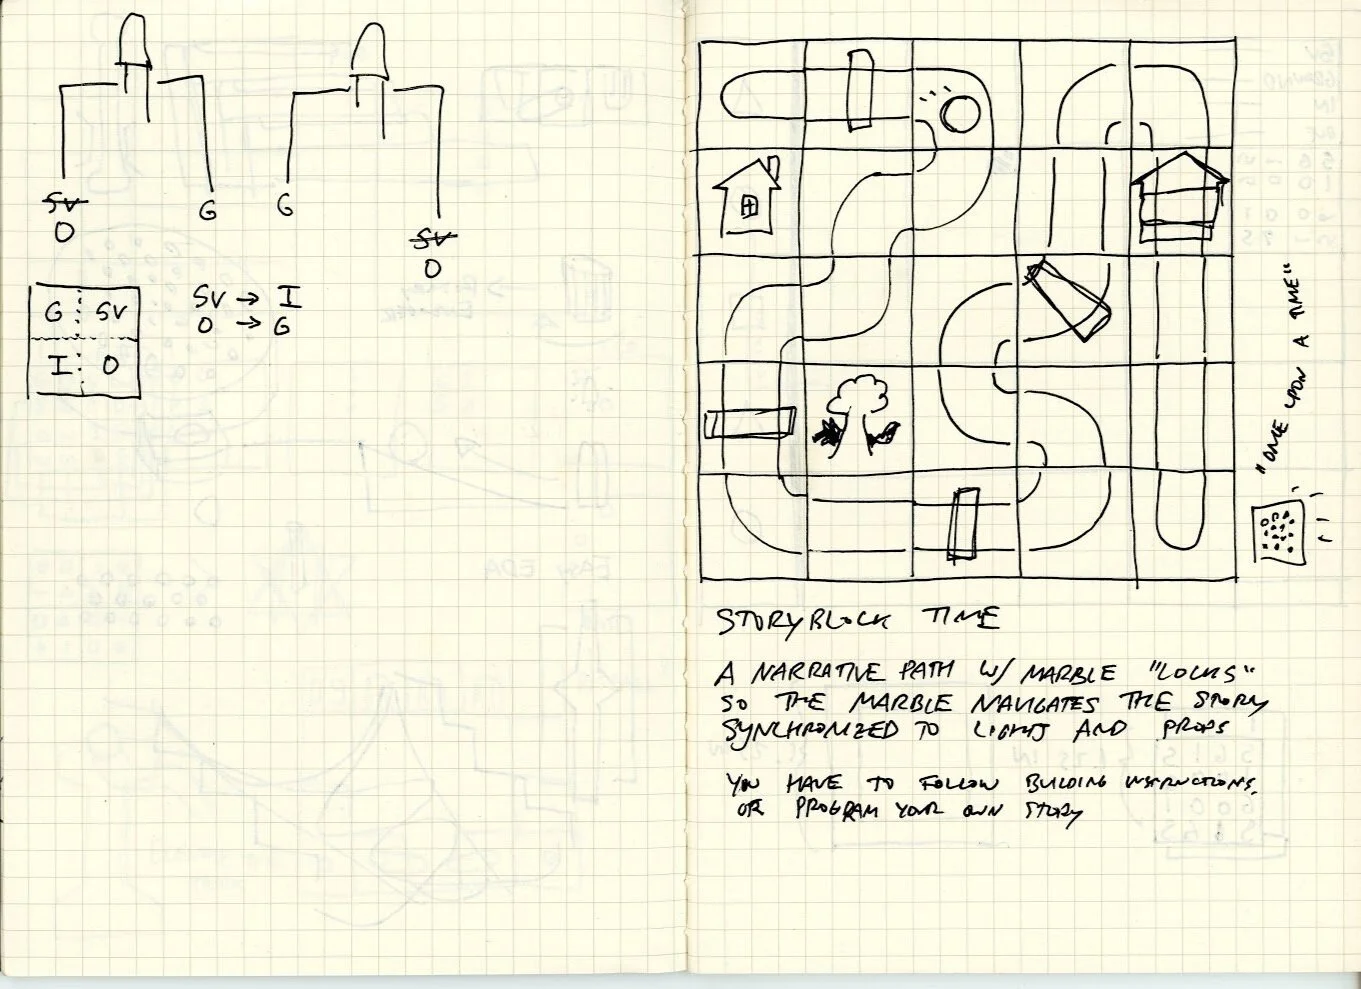
Excerpts from the sketchbook
Prototyping
I’ve been focusing on developing the Arduino powered base and the modular block components. Once I get the hardware working, I can begin to work on the code that will run the logic of the toy. The first block component I focused on developing was the LED block.
The LED block demonstrates how this toy makes electronics more intuitive and playful. Now instead of needing to wire resistors, jumper cables, and components to a breadboard to get the LED to light up, it’s as simple as placing a block on the base.
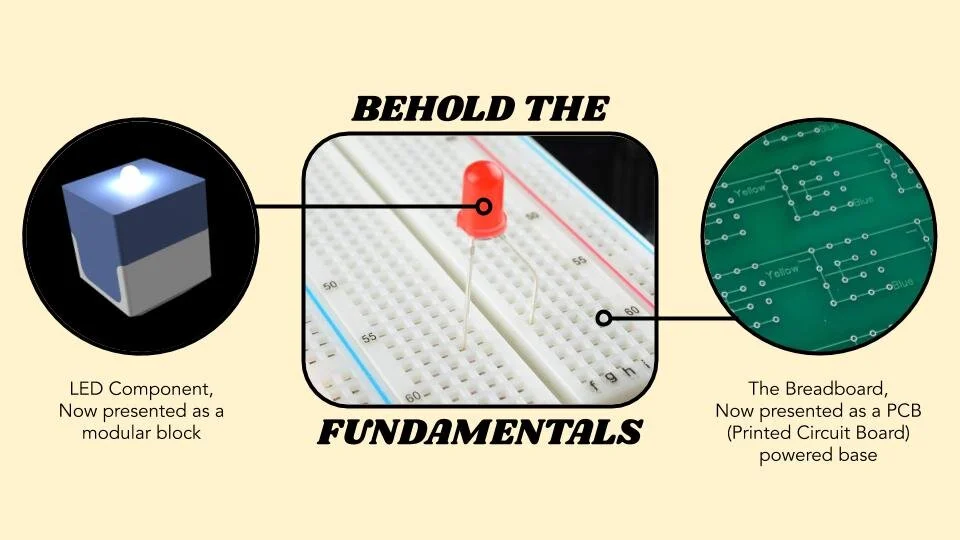
The first electronics project when setting up a breadboard and Arduino is usually to get an LED light to turn on. Here, we replace the LED light with an LED block and the breadboard with a custom PCB (Printed Circuit Board).
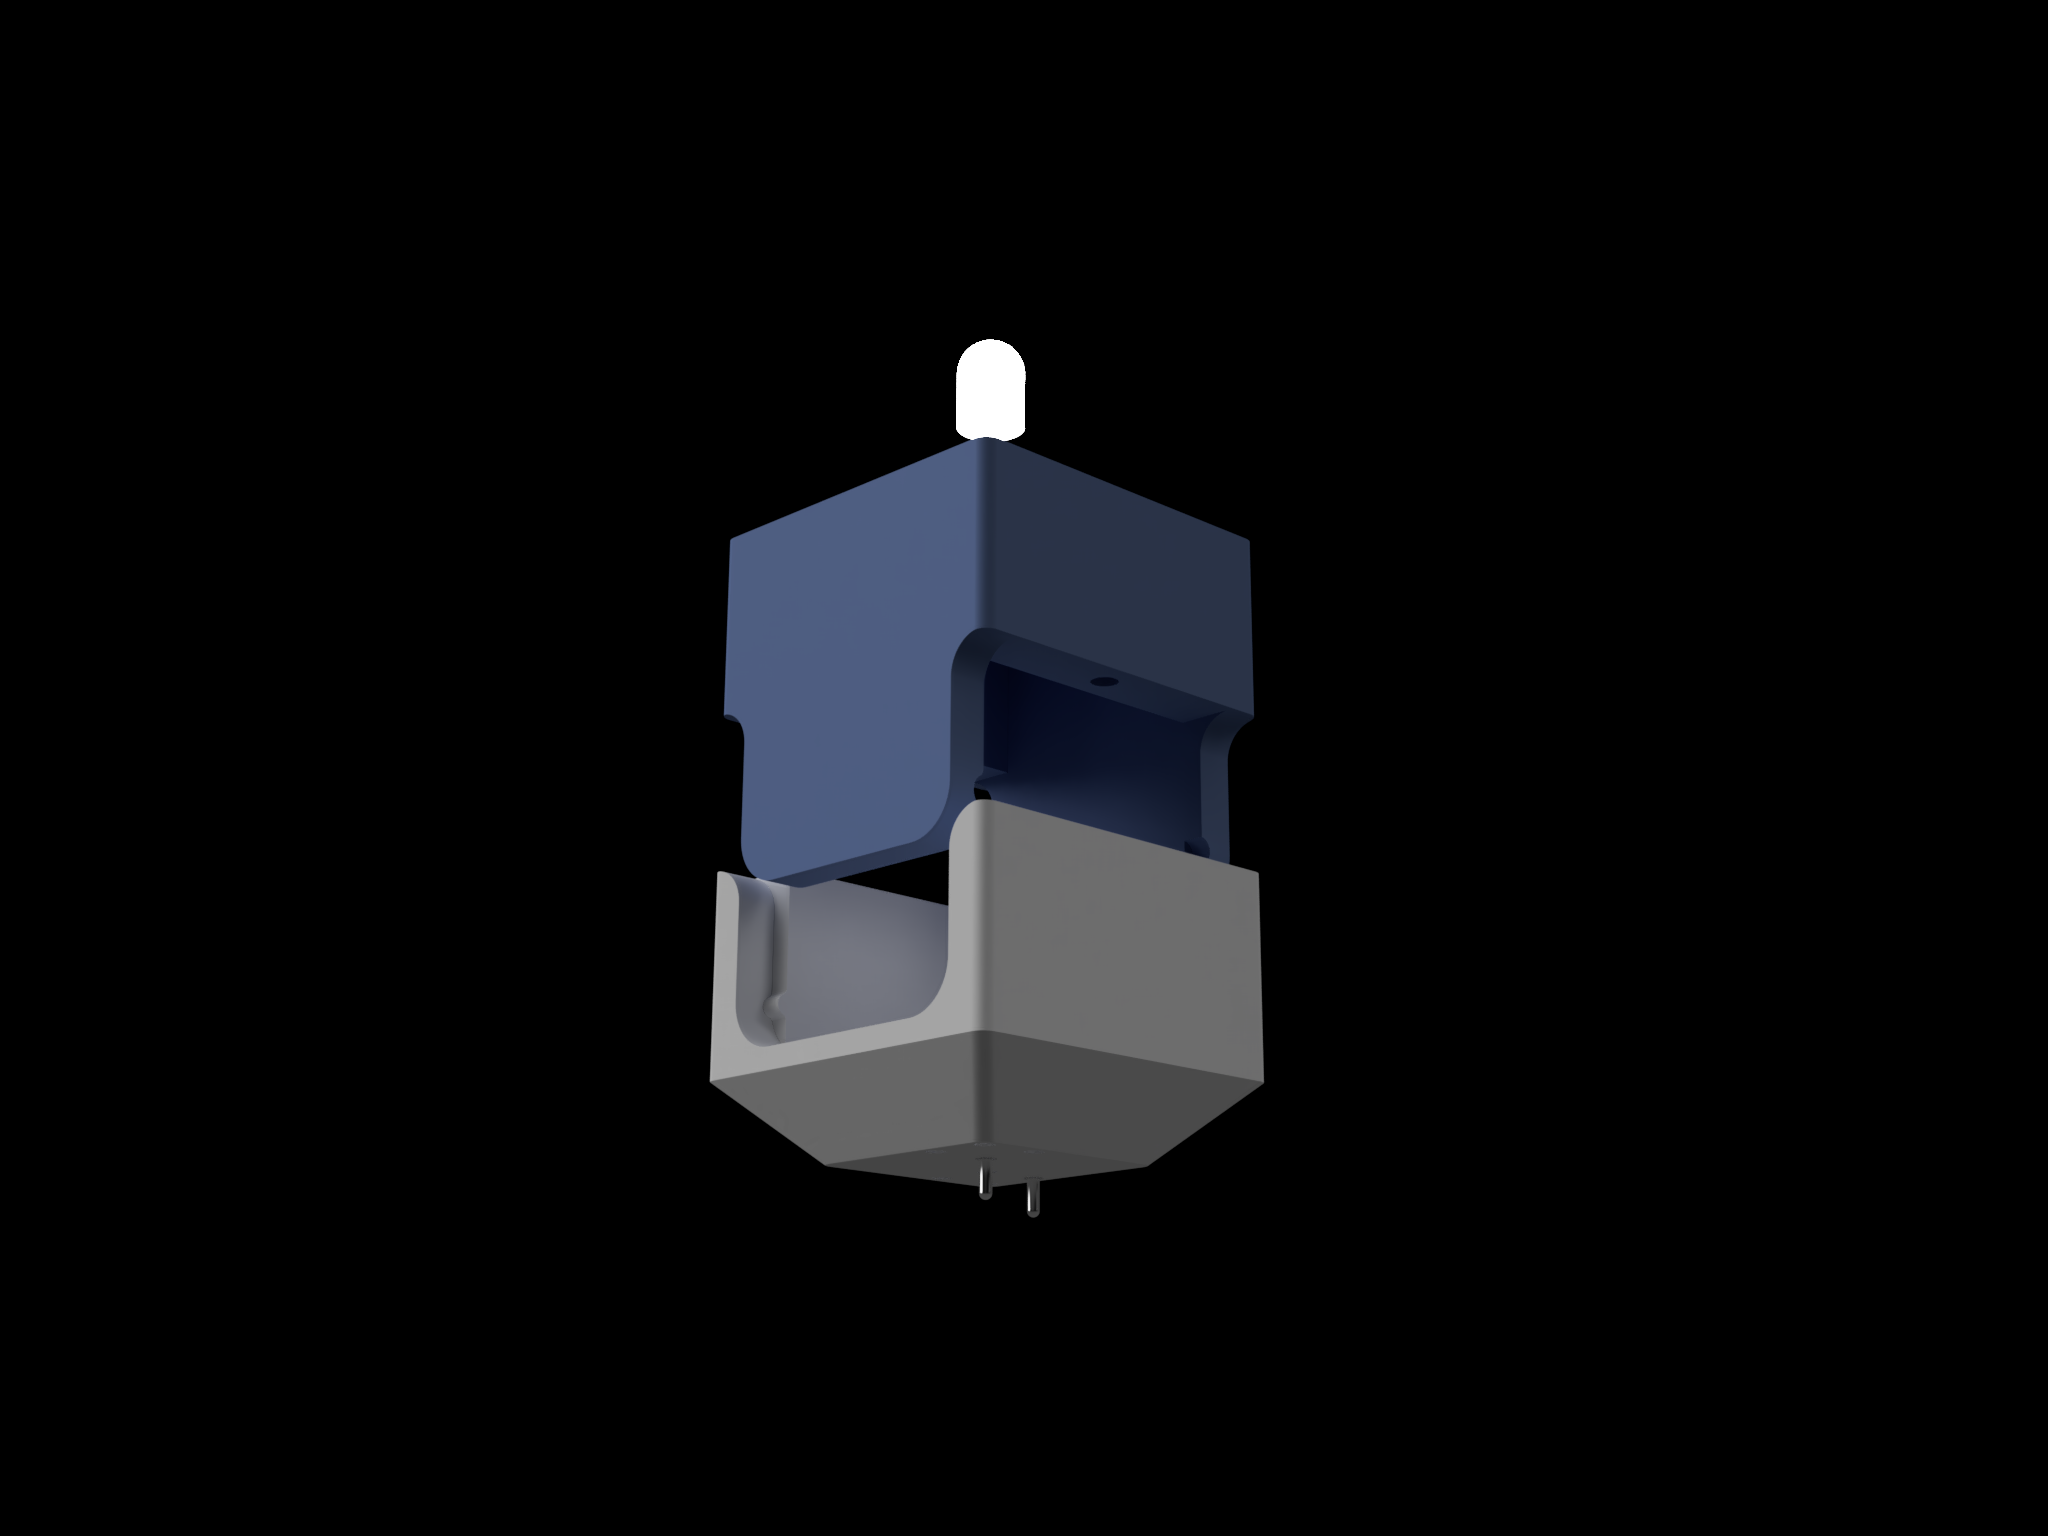
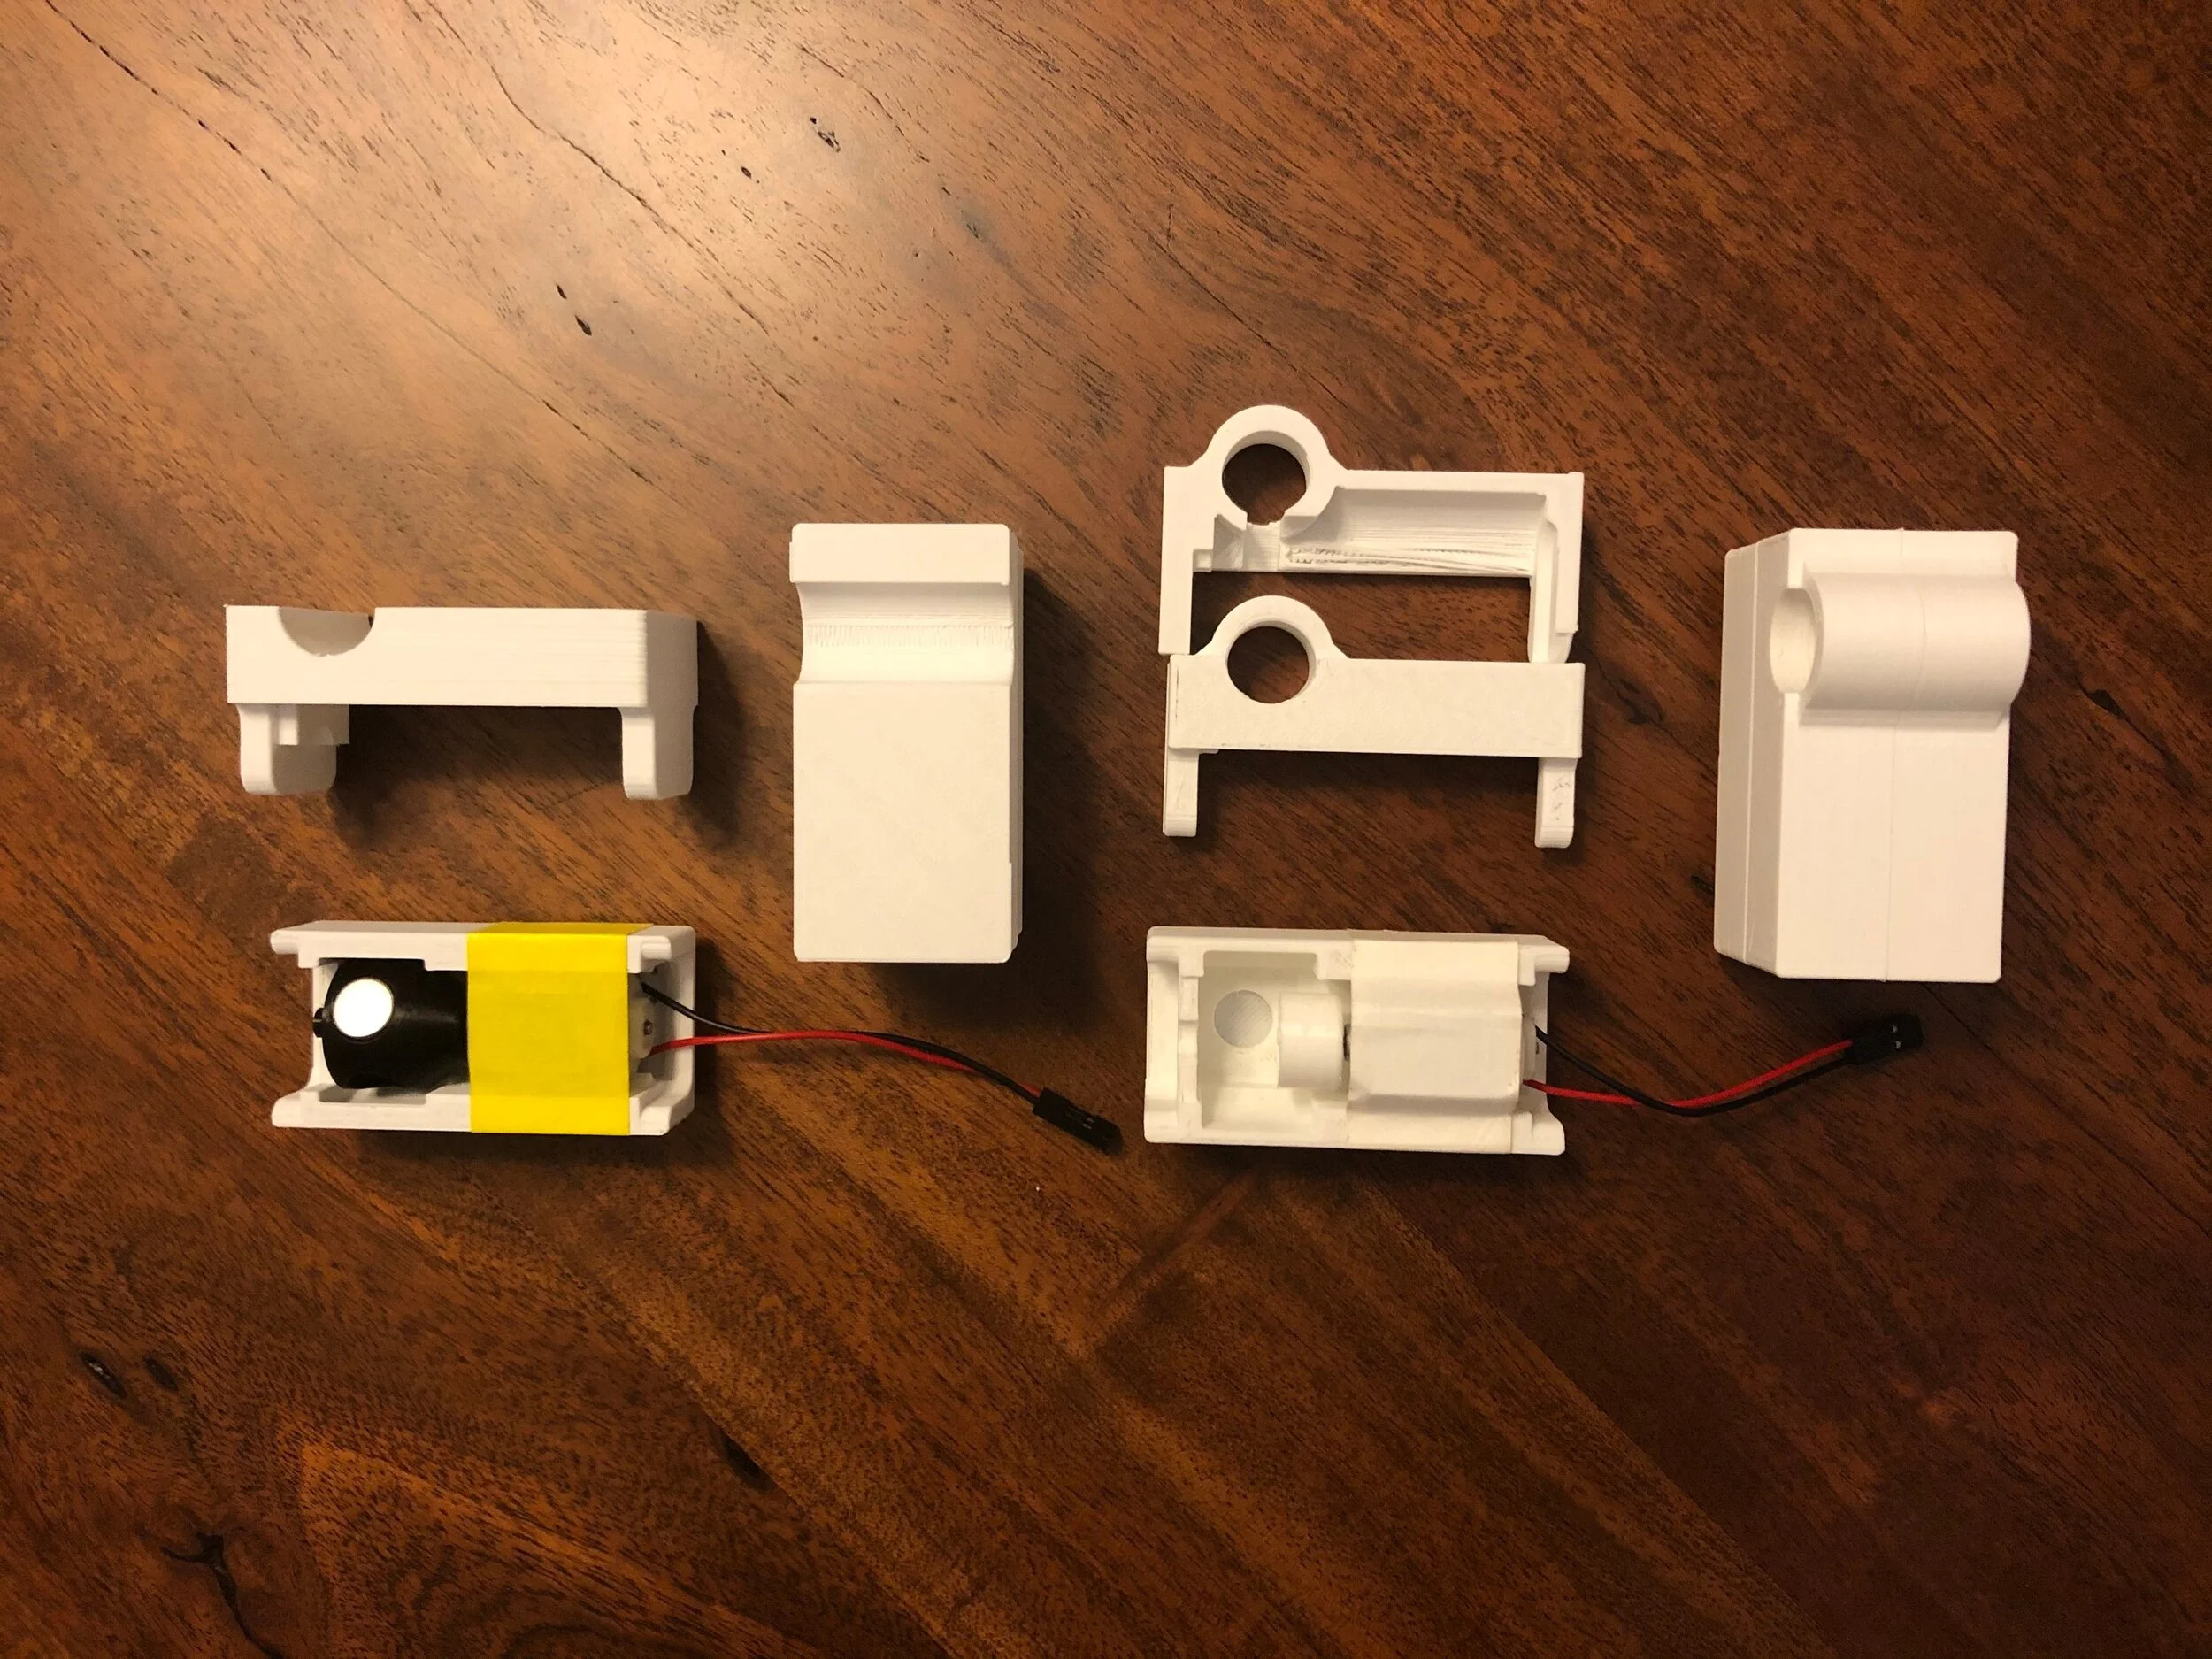
The modular block design went through several iterations, with a focus on ease of production via 3D printer and assembly. The final product will likely not be 3D printed, and at that point the blocks will require another redesign, but for ease of prototyping and development this is currently the most up to date design.
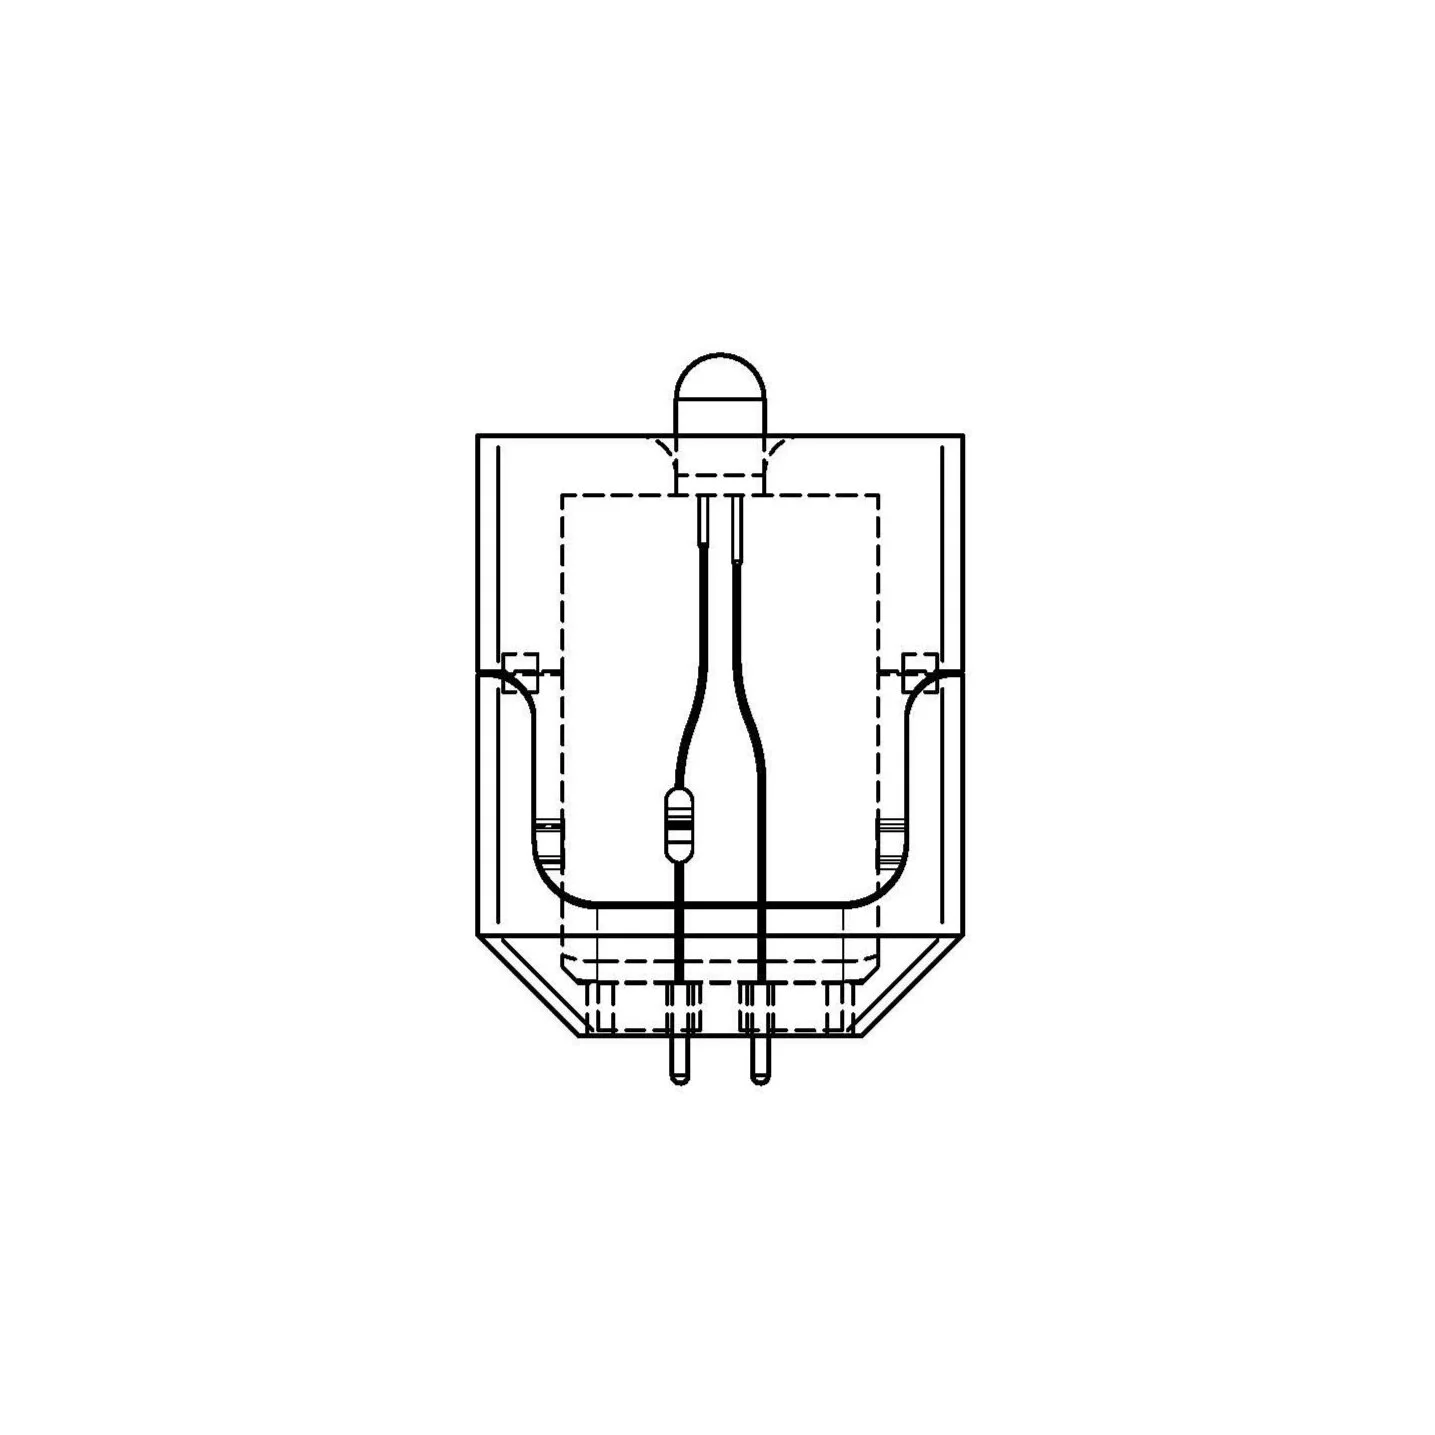
Meanwhile, inside the block there is an LED, the proper resistor, and two pins to interface with the PCB (in this case, one for power and one for ground).
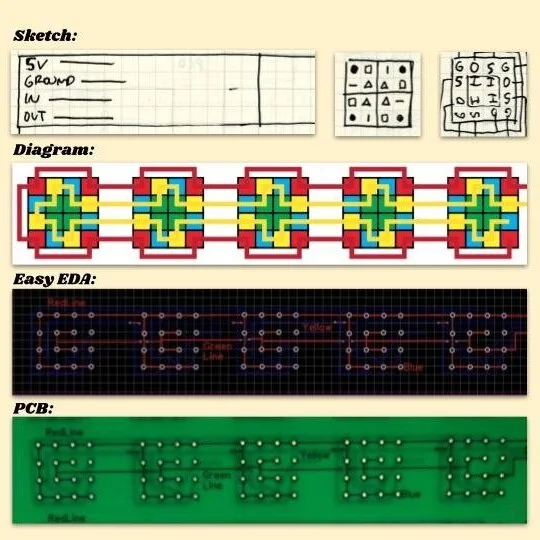
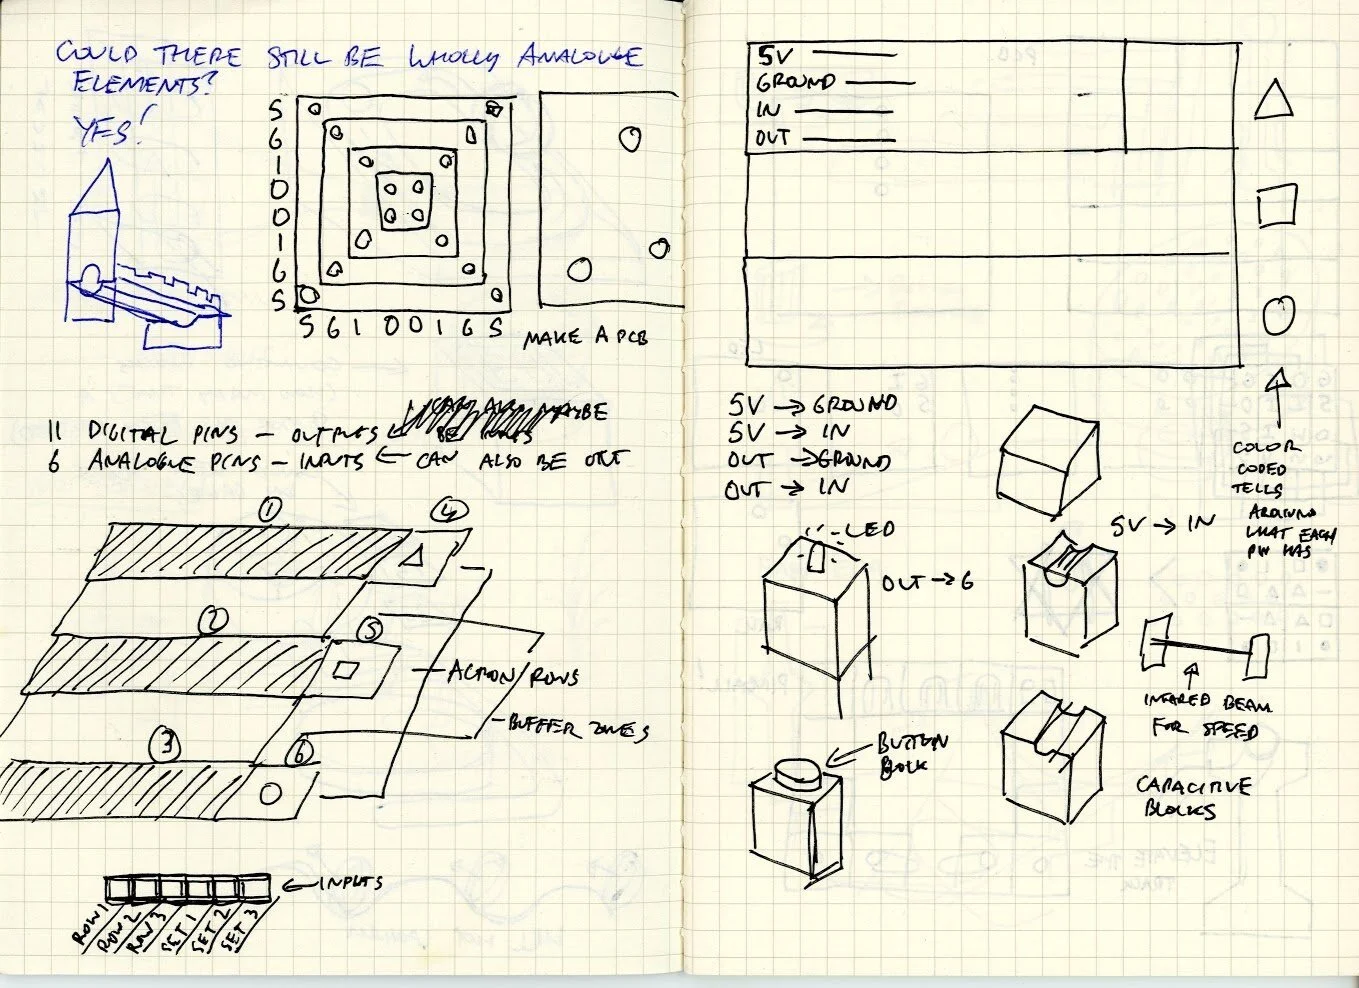
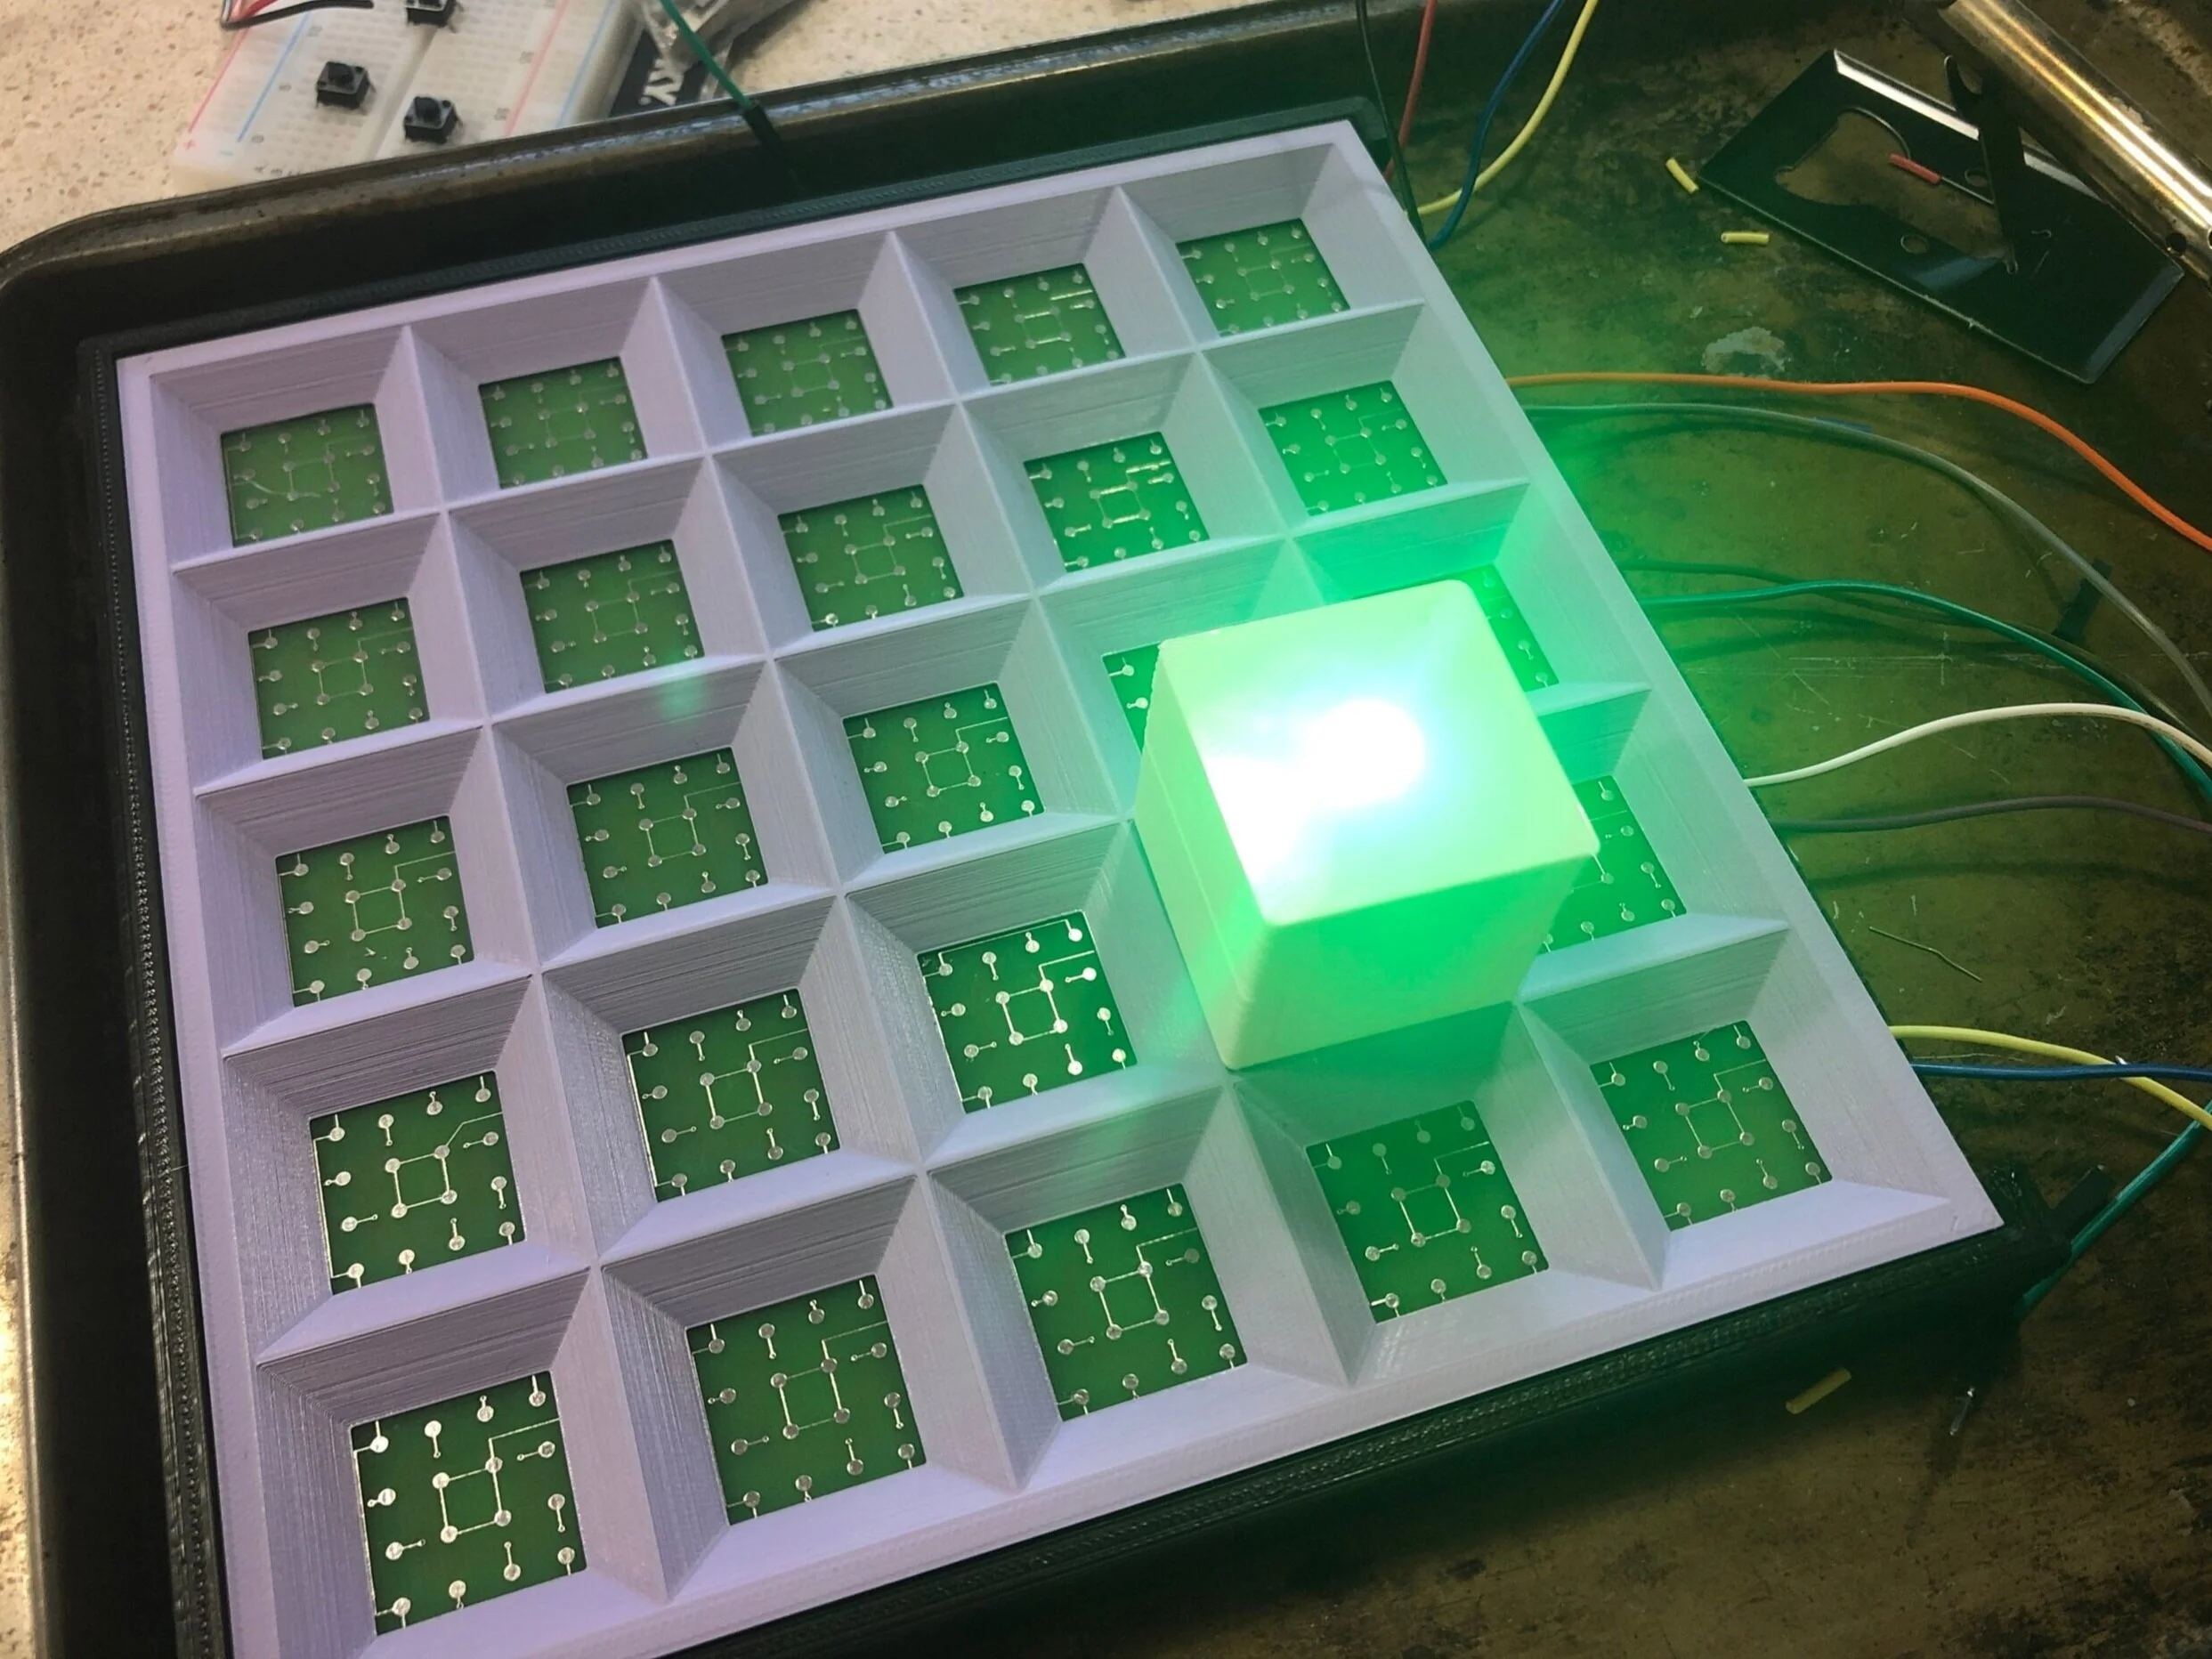
The PCB base was designed to supply Power (5V), Ground, and a unique Input and Output to each row of the base, mimicking the capabilities of a breadboard. Here we had to account for 4 part rotational symmetry from the modular blocks, so the 4 possible contacts are set in a corner and then rotated about the center 4 times, for a total of 16 contacts on the PCB per square on the grid.
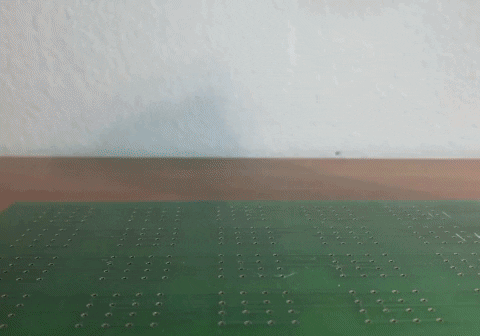
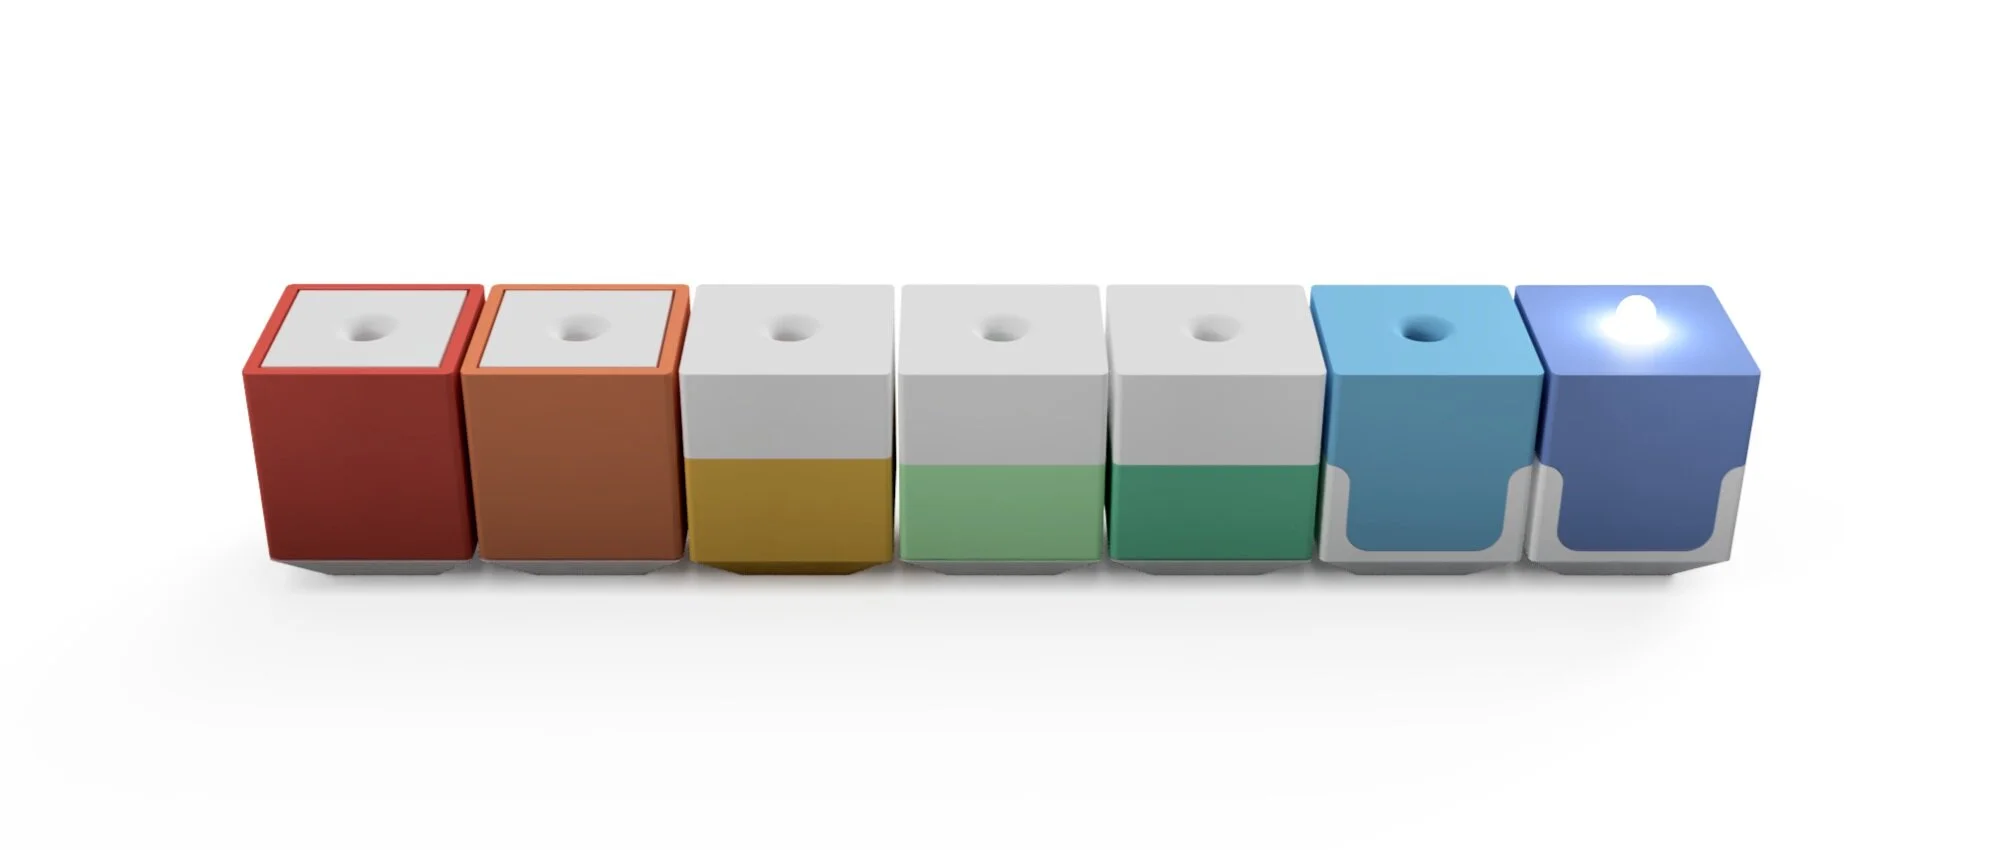
And here’s our MVP! The LED block illuminates when placed on the powered PCB. Next steps are to order a revised PCB design and begin prototyping propulsion blocks to start playing with marble track.
Iteration
Some updates/documentation!
In preparation for my final presentation documenting my progress as a capstone project, two things are happening simultaneously: I am trying to get a working motor block prototype and create new renders of what the final product will one day look like.
First the renders:

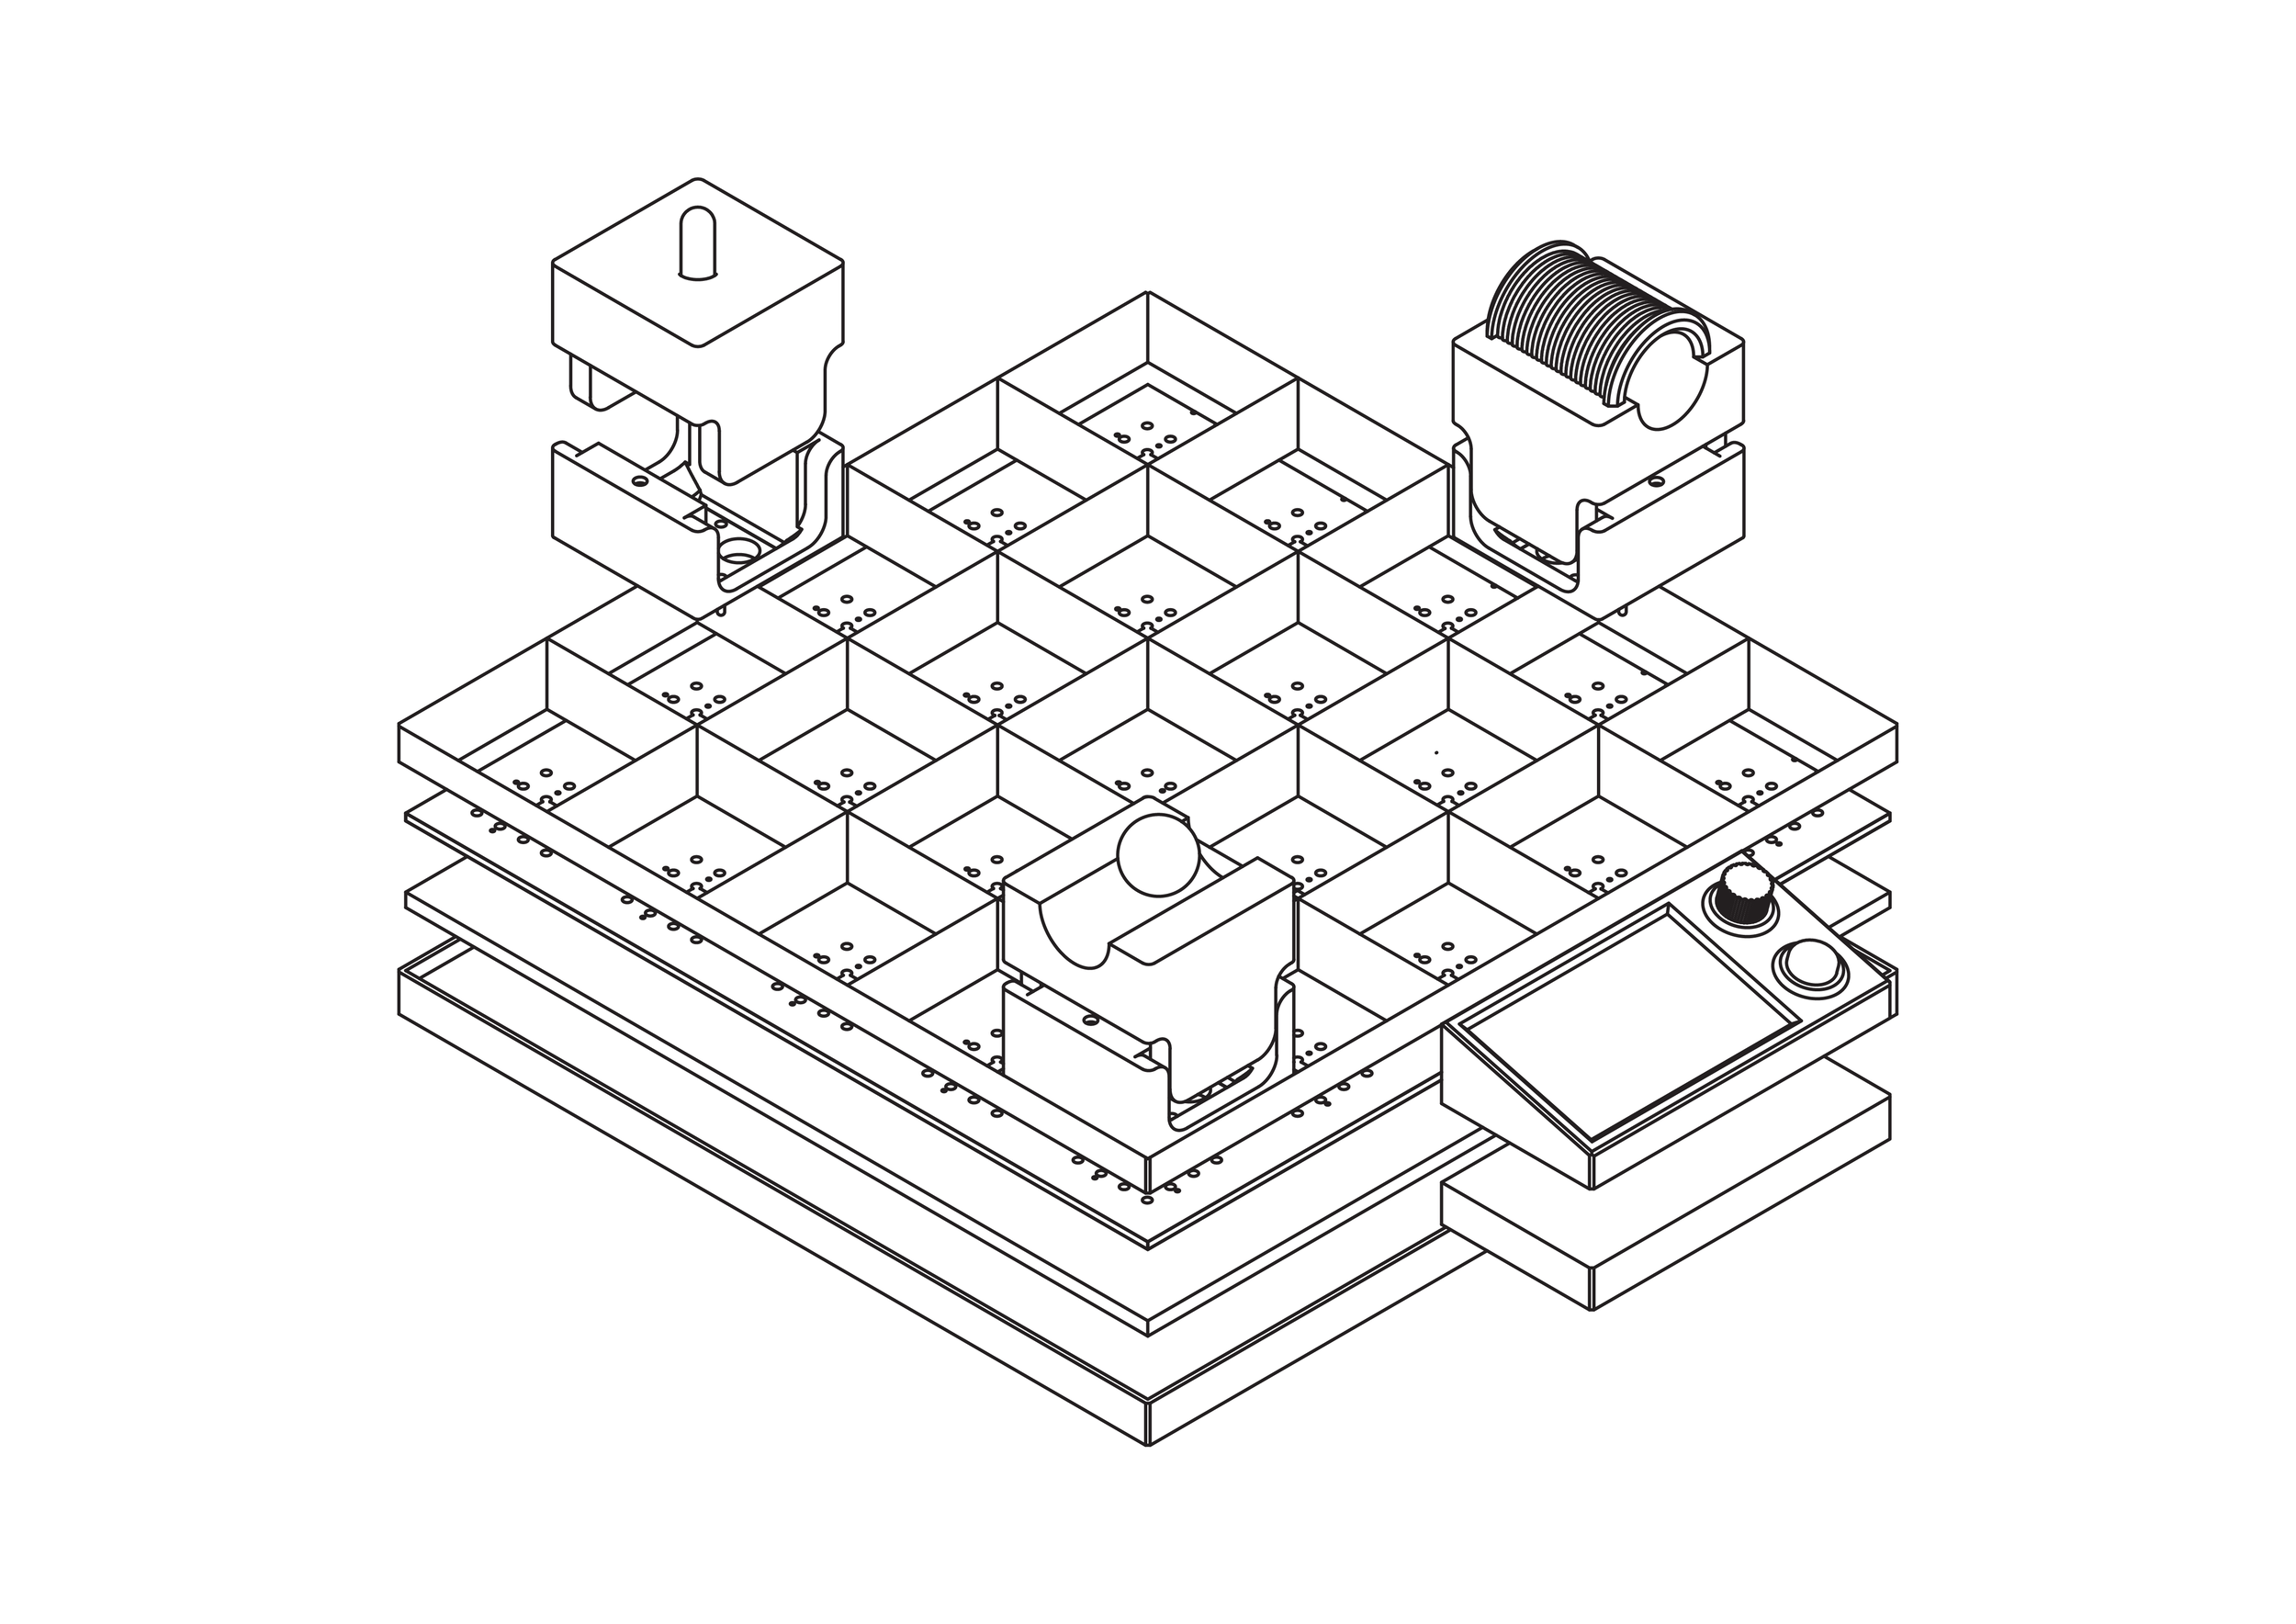
A new base design, with a detachable programming interface. This base is designed with modularity in mind, so that multiple bases can be placed edge to edge allowing more blocks to communicate with each other. Also a fun blueprint/exploded view.
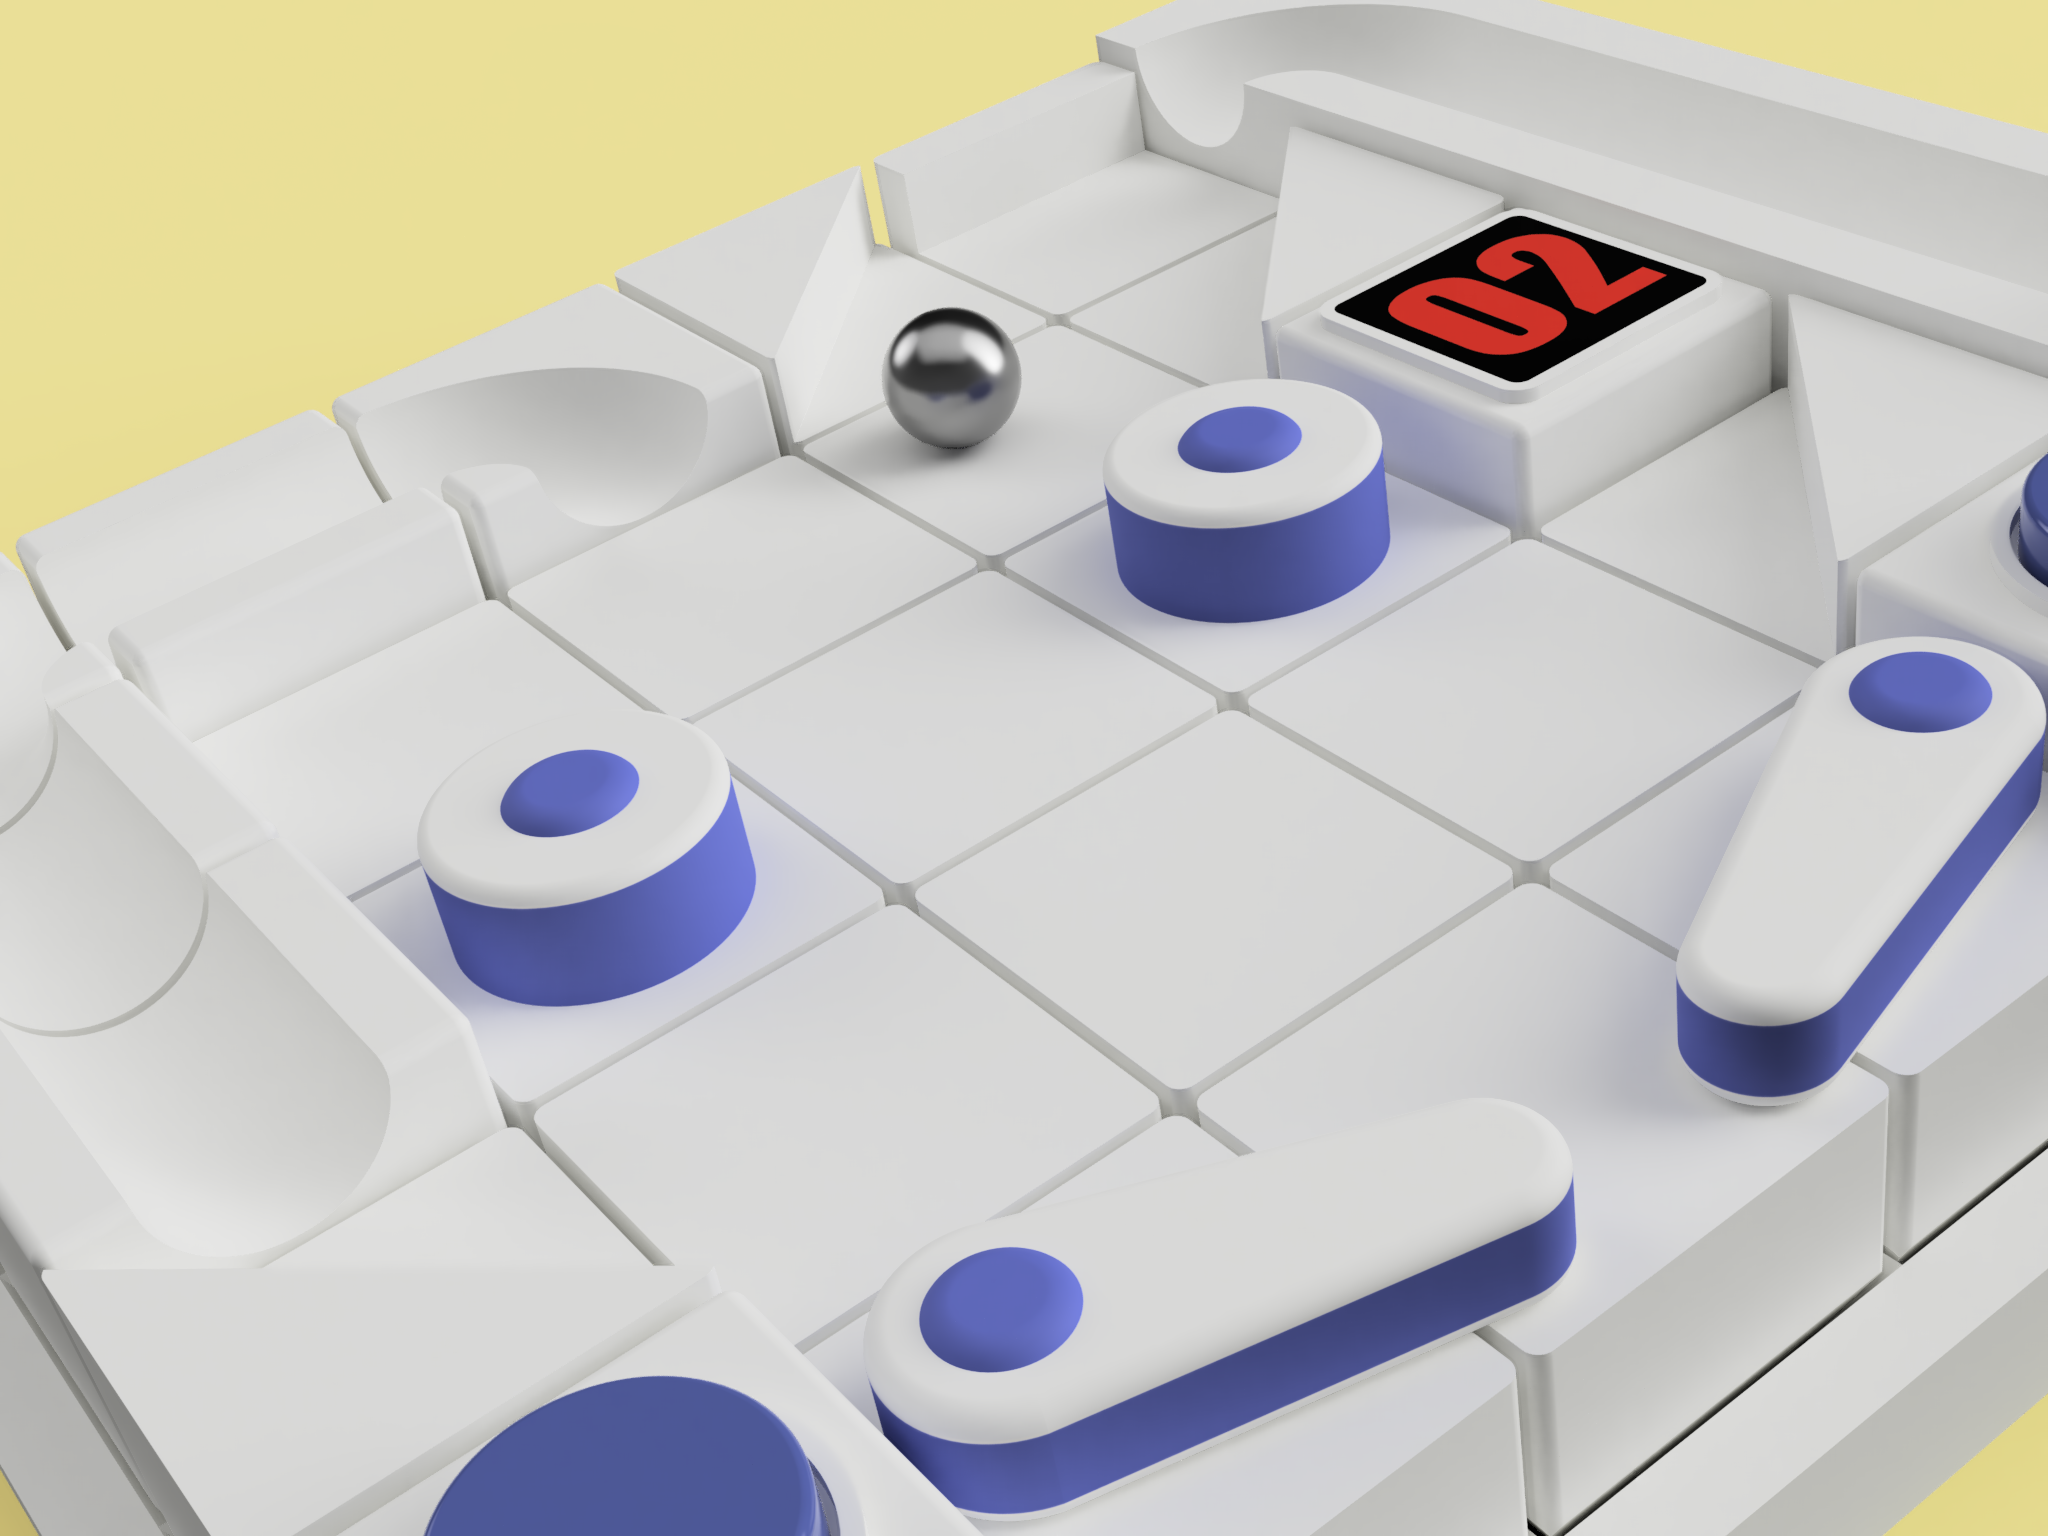
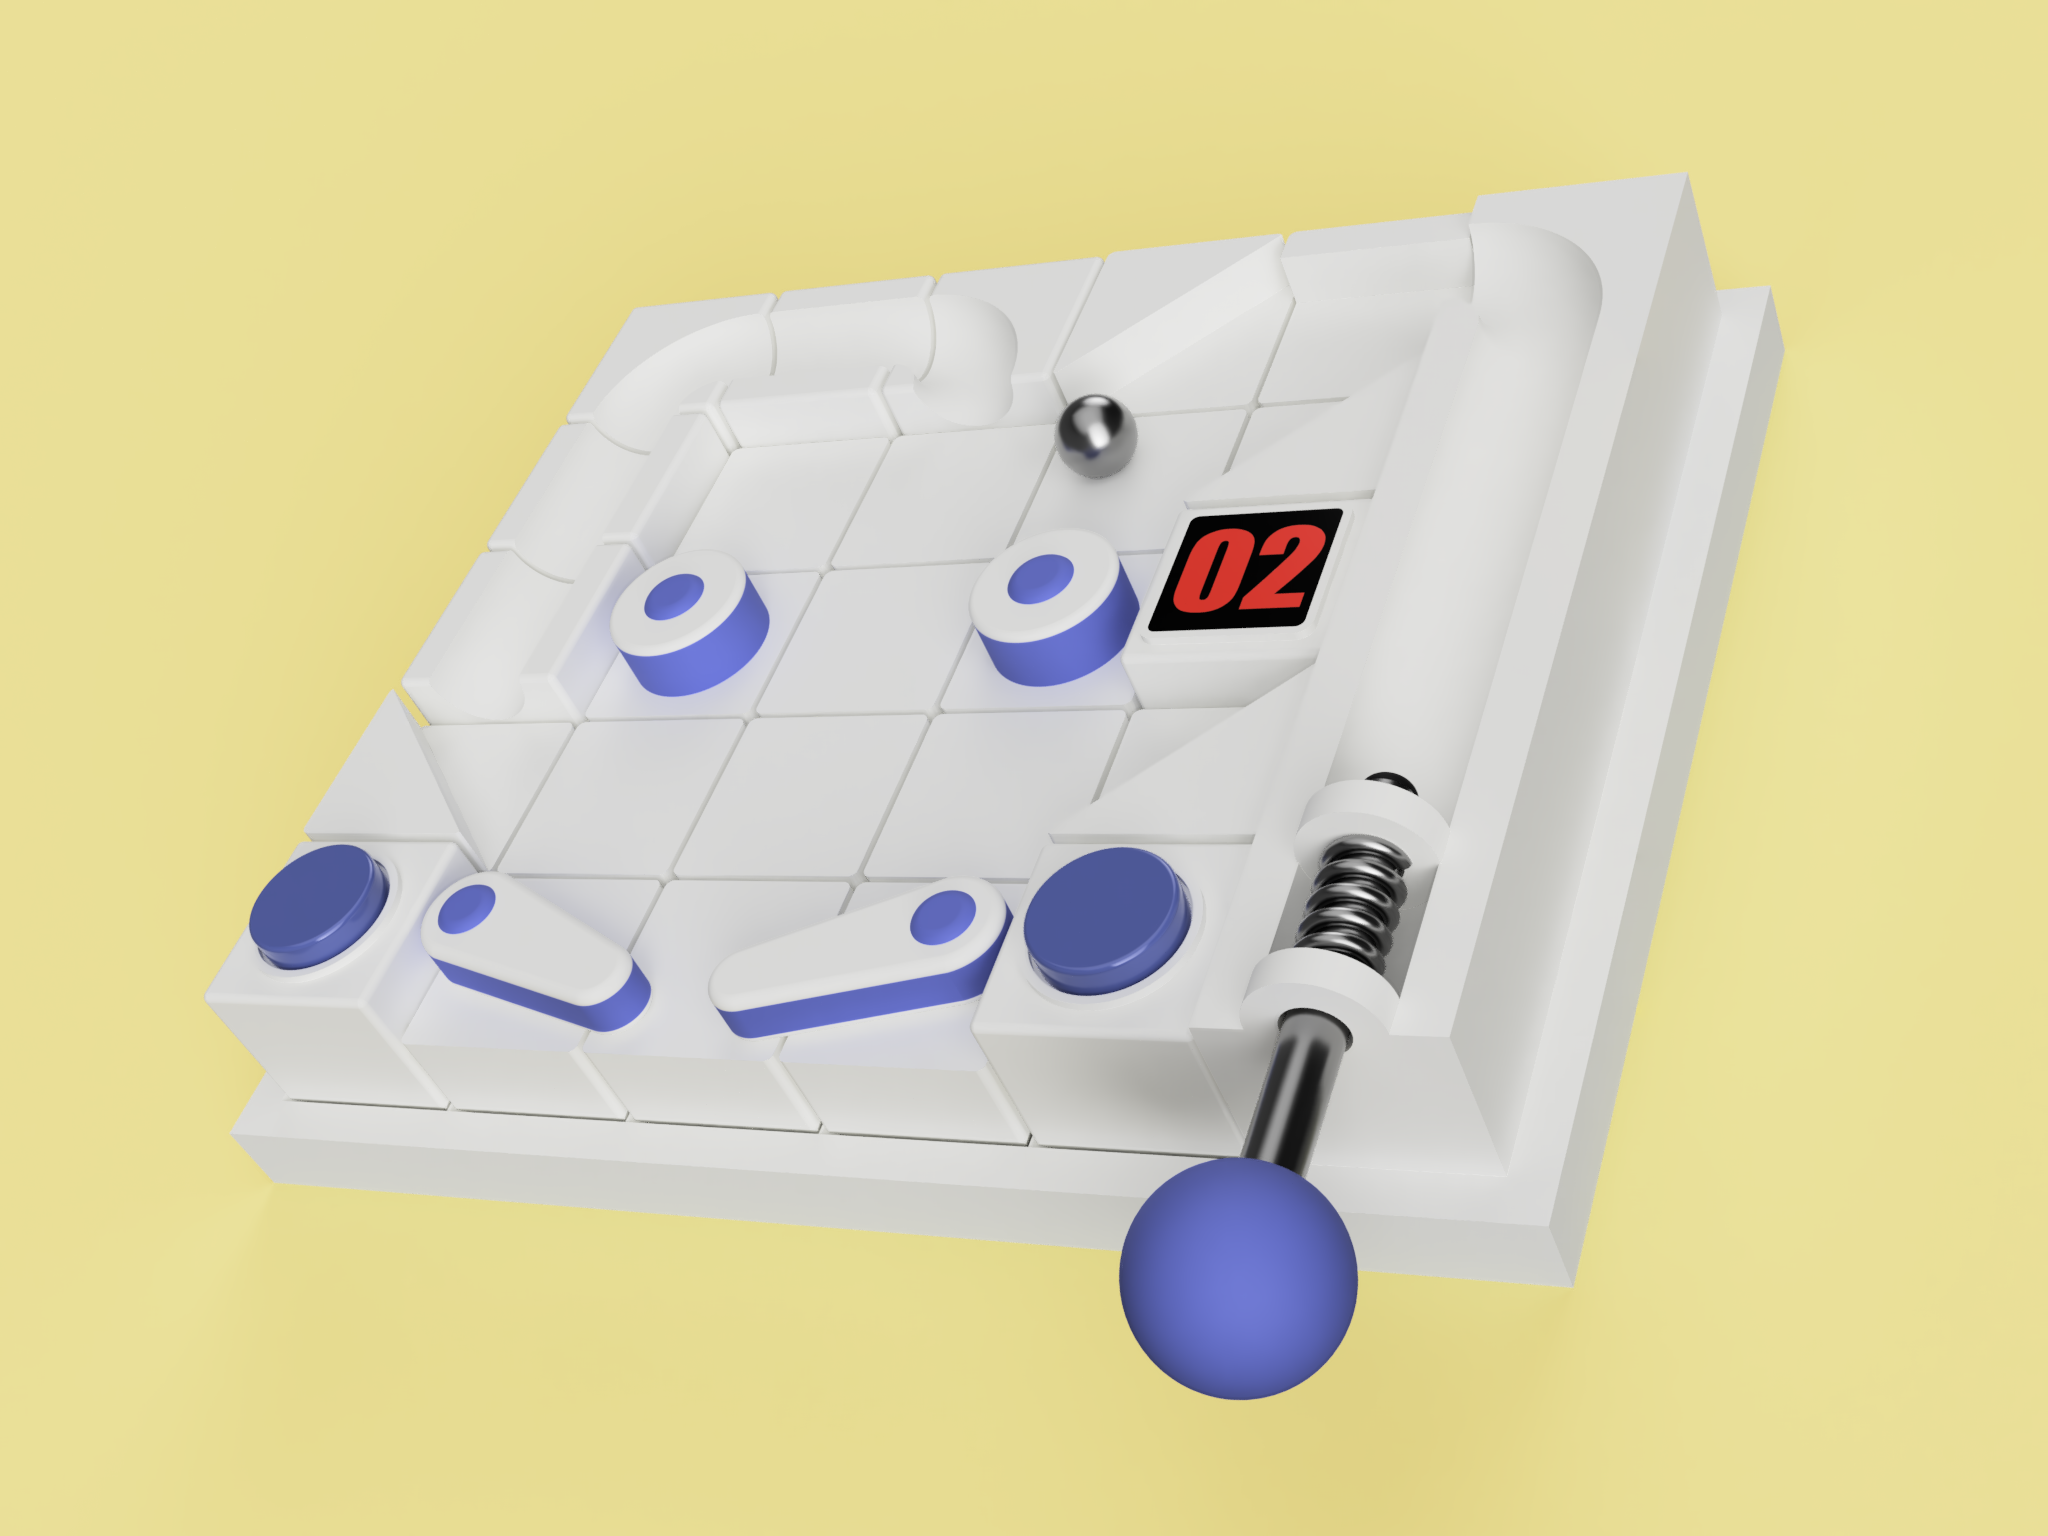
A new arcade buildout, a successor to the pinball machine idea. Scoring blocks keep track of how many times the player successfully bounces into each target.
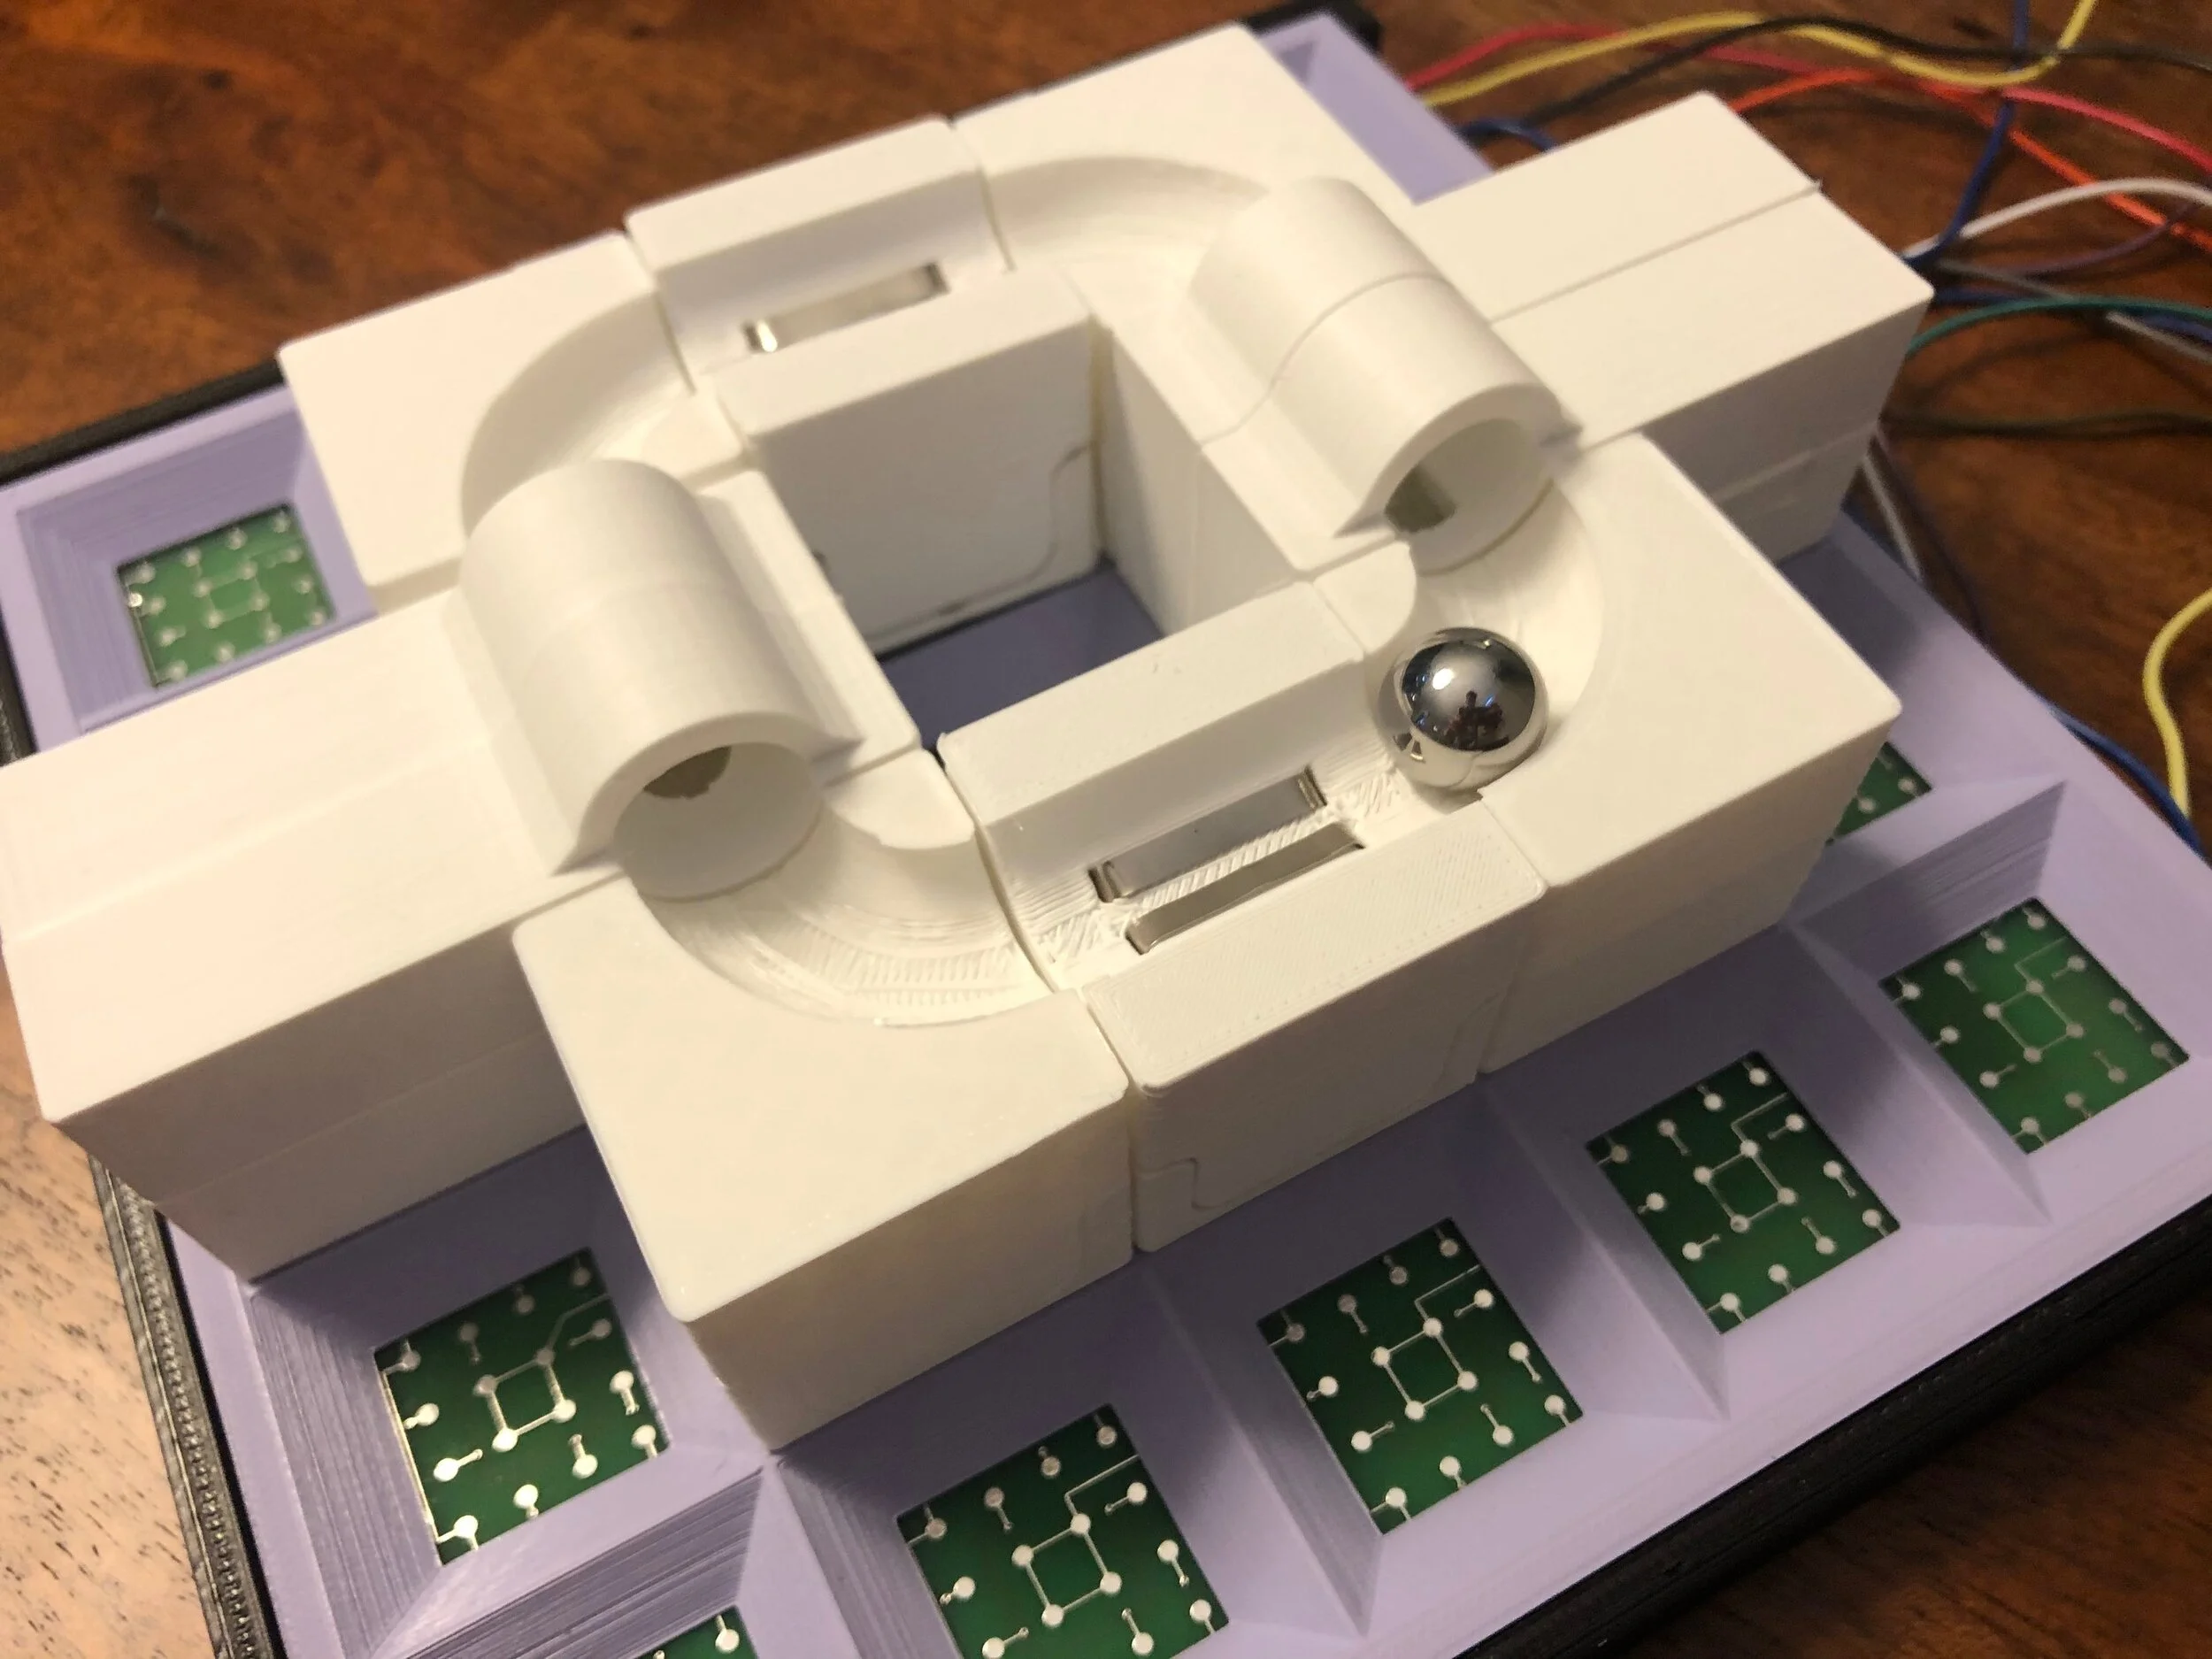
A more intricate marble run. A couple of things to note: the 5x5 bases are modular, and special 2x1 blocks can connect them. Also the flexible silicone track pieces with wire in them that can be bent in creative ways to create more interesting track layouts.
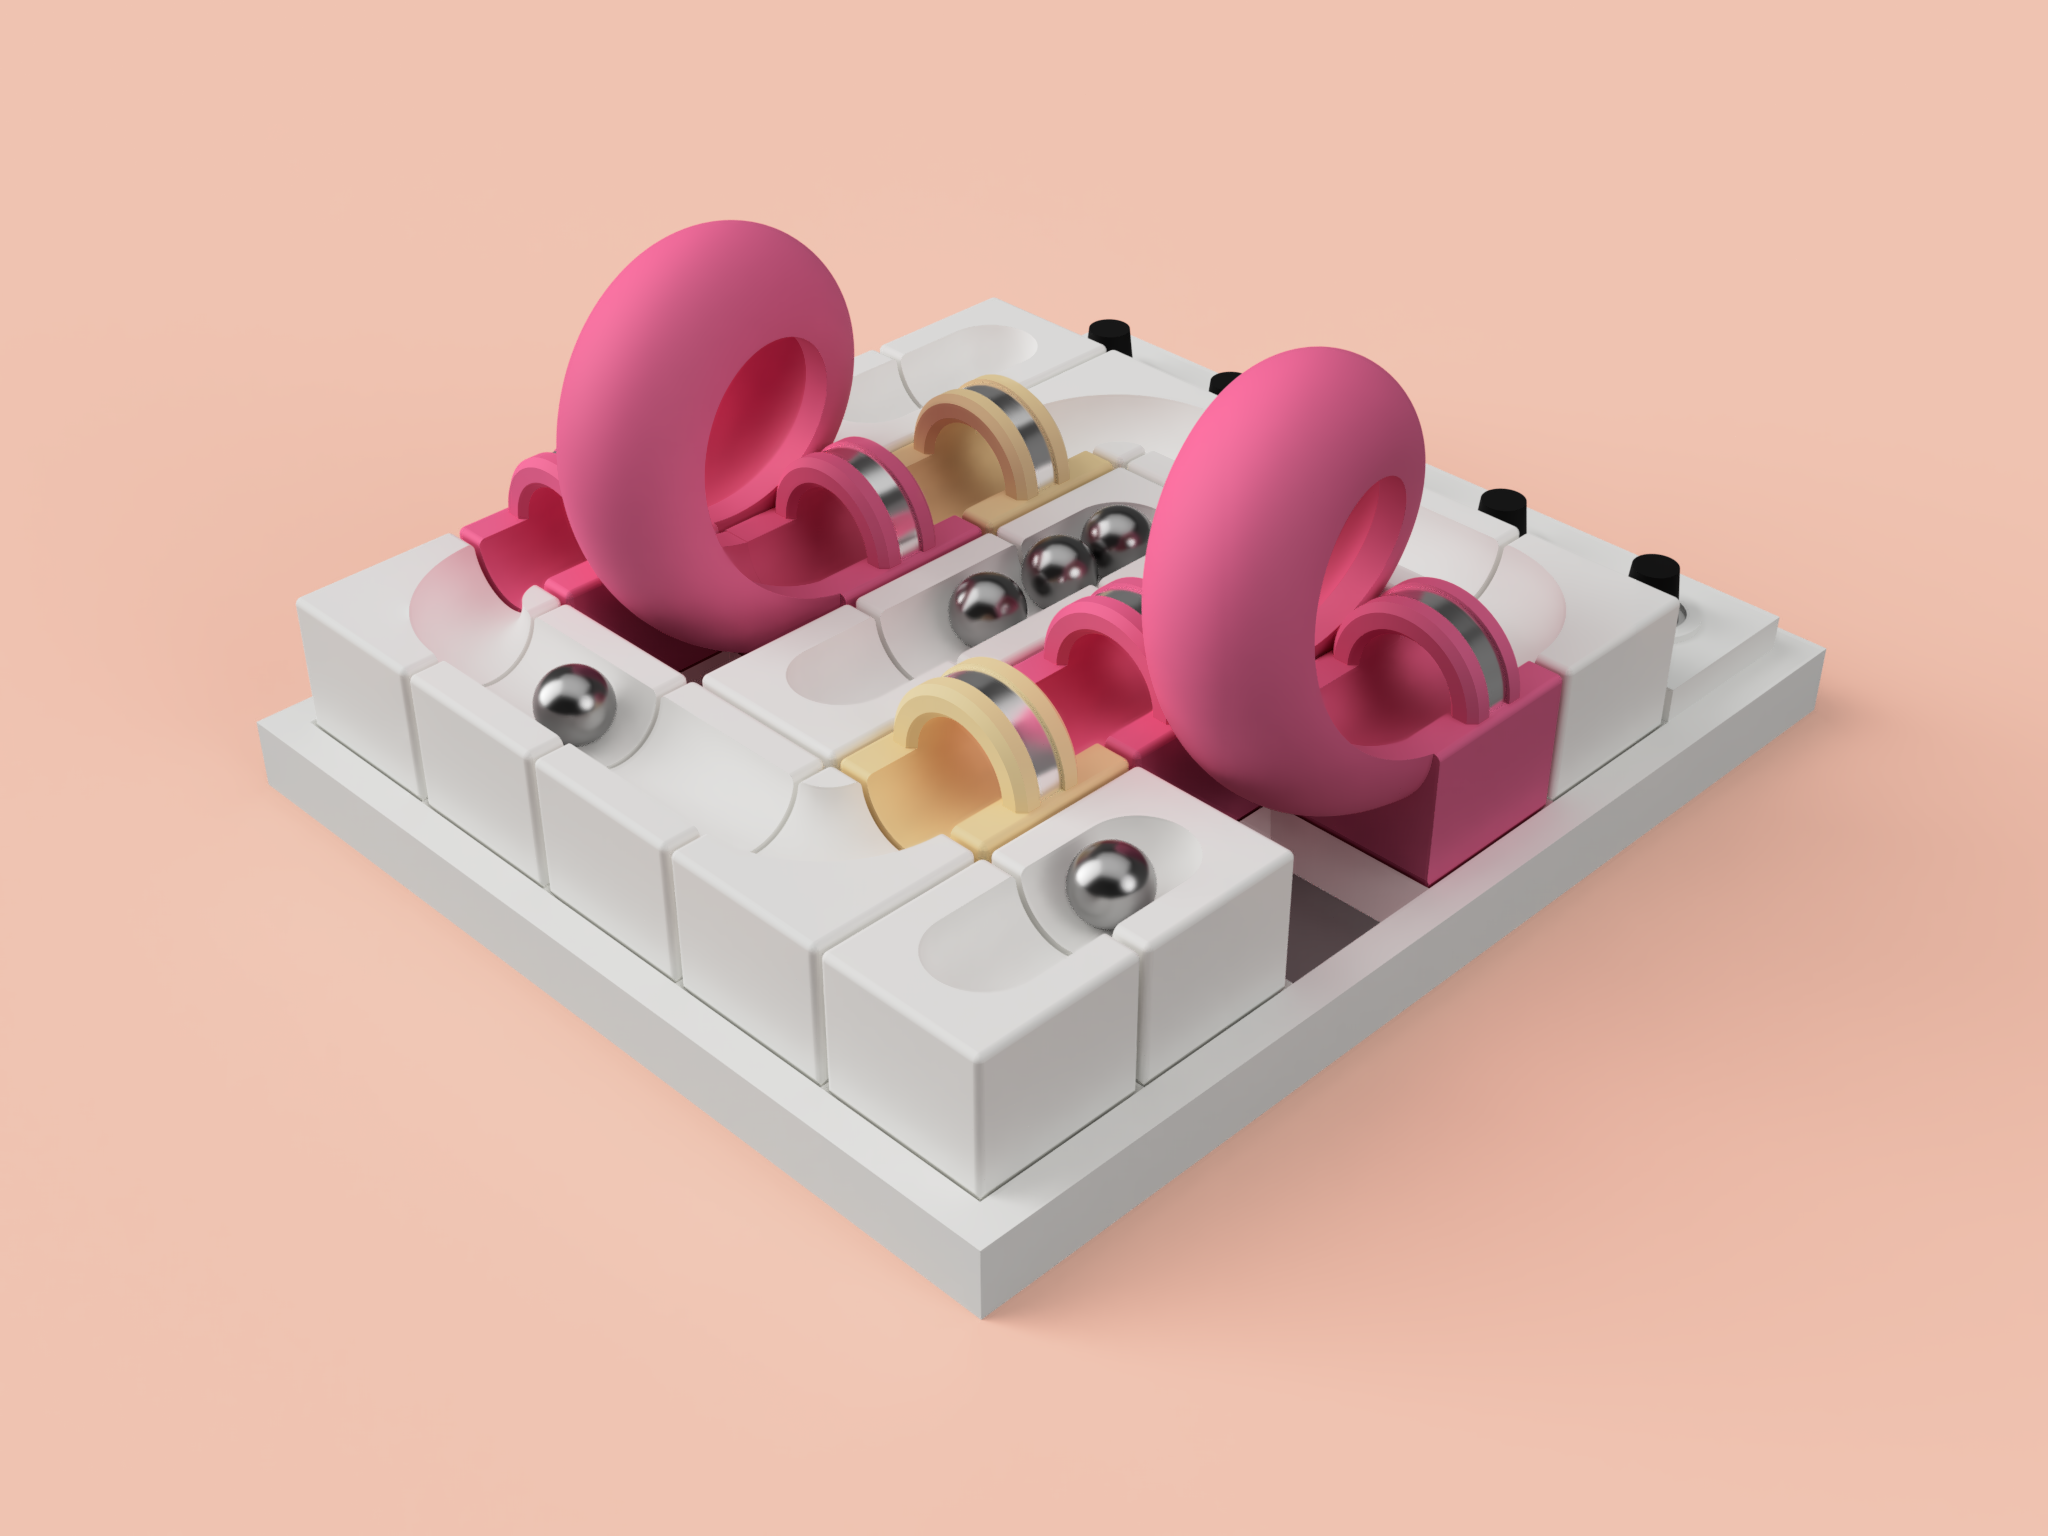
Expanding the bases further to create a marble powered midi instrument. Use looping marbles on a closed track to create a loop, or lay out an array of marbles to create a looping tune. Additionally, slide the copper stylus along the copper contacts to play the toy like a keyboard.
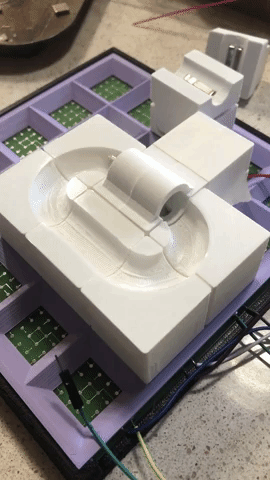
You may notice in all the renders so far the copper tunnel blocks. The hope is to one day be able to build an electromagnetic launching block that will propel the marbles along the path. However, in the meantime, I’ve started prototyping a simpler motor-powered launching block to propel the marbles.
With the arrival of the second iteration PCB, I’ve been able to start designing more functional blocks that interface with the base.
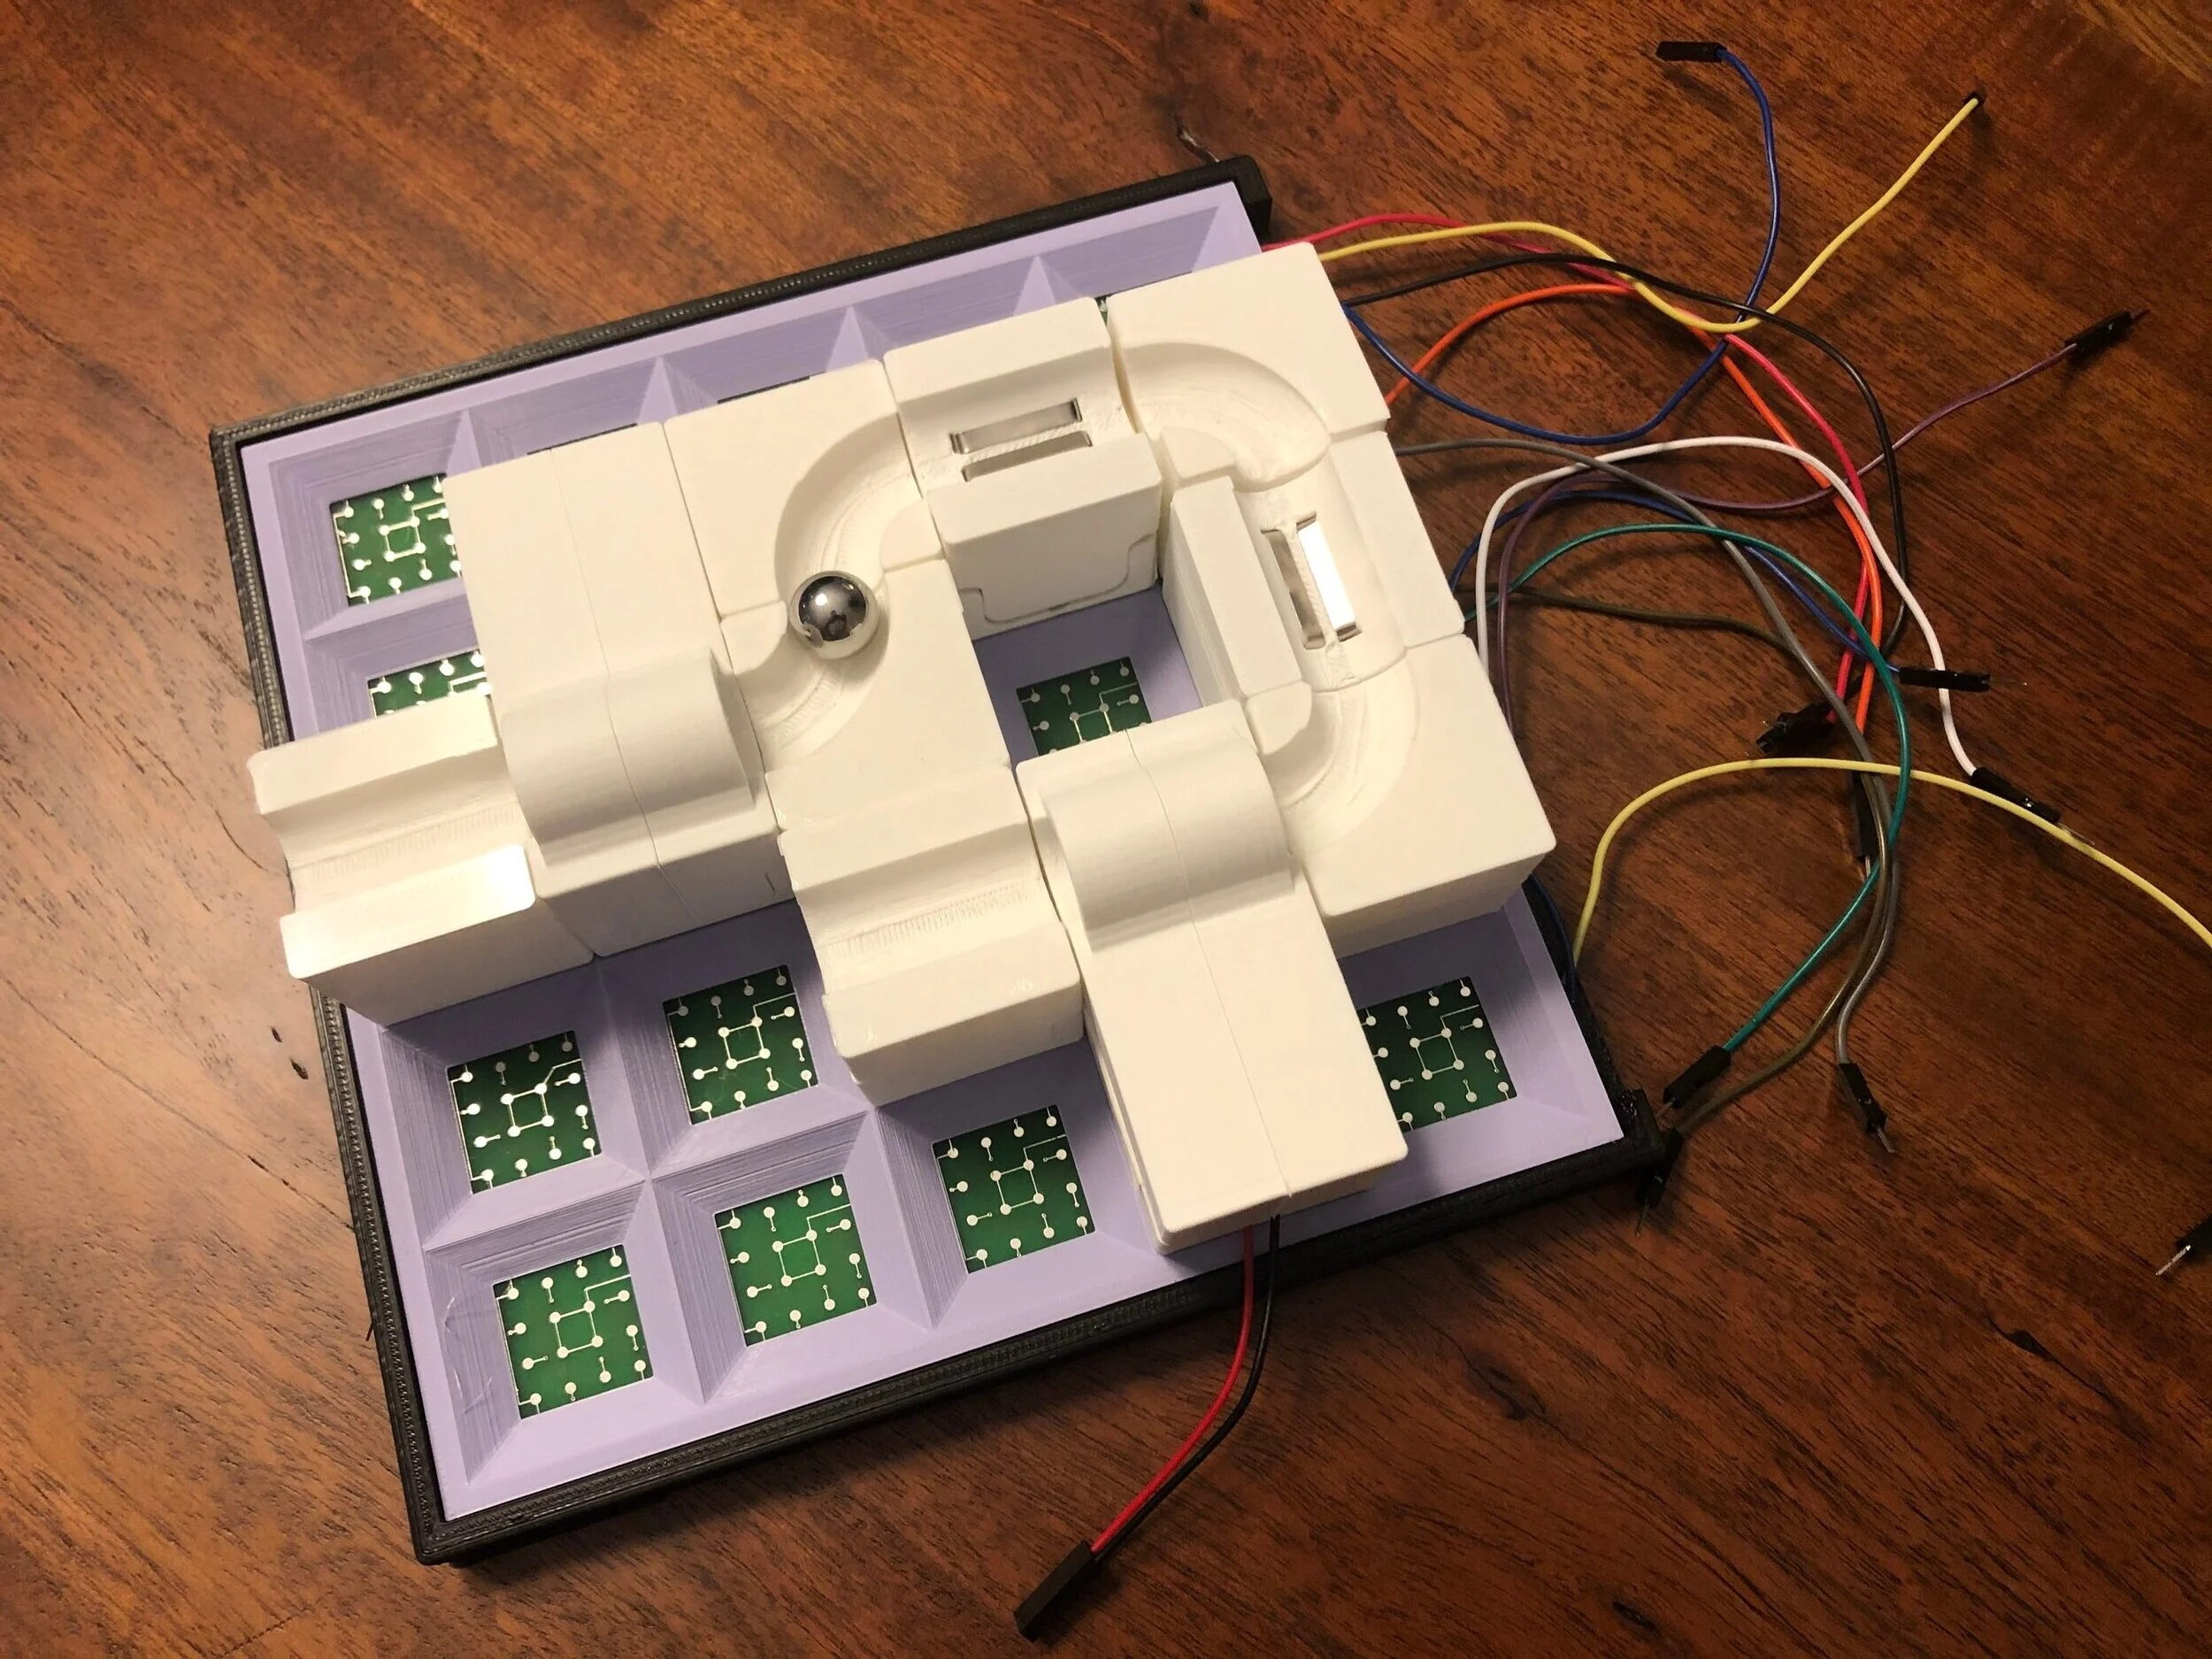
And finally, here’s a marble getting launched by one of the test blocks. Plenty of refining to do, but happy with this proof of concept!
Next steps:
Right now, the big next steps are to continue prototyping functional block components so that the toy can start communicating with the Arduino. Motor blocks, marble detection blocks, LEDs, and counting blocks should be enough to start building out play systems like the pinball table or skeeball bounce game.
I also want to start expanding the development team, and partnering with one or more industry mentors/advisors so the product can be developed faster. It’s time to make this a reality, and keep playing as we go.